

What do you think of when you think of Christmas time? I think of my mom’s homemade cranberry bread, twinkly little lights around the windows, Mickey’s Christmas Carol on TV, and Nat King Cole singing “Chestnuts roasting on an open fire…”.
I also think of all things peppermint. There’s no better time of the year to break out the peppermint extract! Any other time of year, and you’ll just look like a weirdo. Since it’s December, you’re safe for the time being.
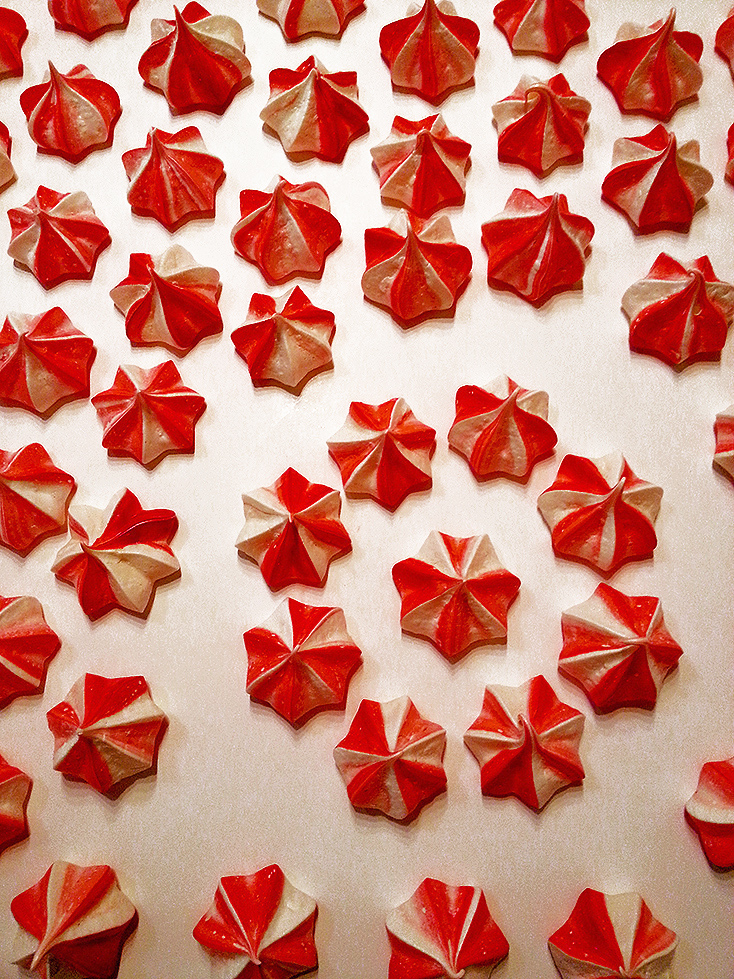
These little cuties popped up recently on Joy The Baker and I knew instantly that I wanted to make them! They’re just too cute. Who wouldn’t love little crunchy meringues flavored with peppermint and streaked with the perfect bright Christmas red?
crunchy little peppermint
meringues
(yields 64 little mints; recipe from joythebaker.com)
3 egg whites (98 g)
3/4 c (156 g) granulated sugar
1/2 tsp peppermint extract
red gel food coloring
(I used AmeriColor in #120, Super Red)
Turn on your oven to 175 degrees. Put parchment paper on two sheet pans, and set them aside.
Put a small pot of water on the stove over medium heat, and when it’s simmering, place a bowl on top that’s slightly larger than the size of the pot. Into the bowl will go the egg whites and sugar! Stir the egg whites with the sugar for 2-3 minutes over the simmering water until the mixture is very warm to the touch and the sugar doesn’t feel grainy anymore.


Pour the egg white mixture into the (very clean, grease-free) bowl of your stand mixer, and using the whip attachment, beat the whites on medium high (speed 7 if you’re using a KitchenAid) for 10 full minutes. By now, your gloppy egg whites should have become a bright white, billowy mass of stiffly beaten meringue! Add the peppermint extract and whip again briefly to combine it with the meringue.


Grab a disposable 18 inch piping bag fitted with a star tip (I like a nice open star tip like an Ateco #825), and squeeze some of the red gel color into a small dish. Stand the upright and open bag inside of a tall drinking glass, and using a small, clean, new paintbrush, brush some streaks of red gel color on the inside of the bag, starting from the widest part of the star tip to at least the top third of the inside of the bag. Repeat this step 3 or 4 times around the inside of the bag so that you have evenly spaced lines of red color.
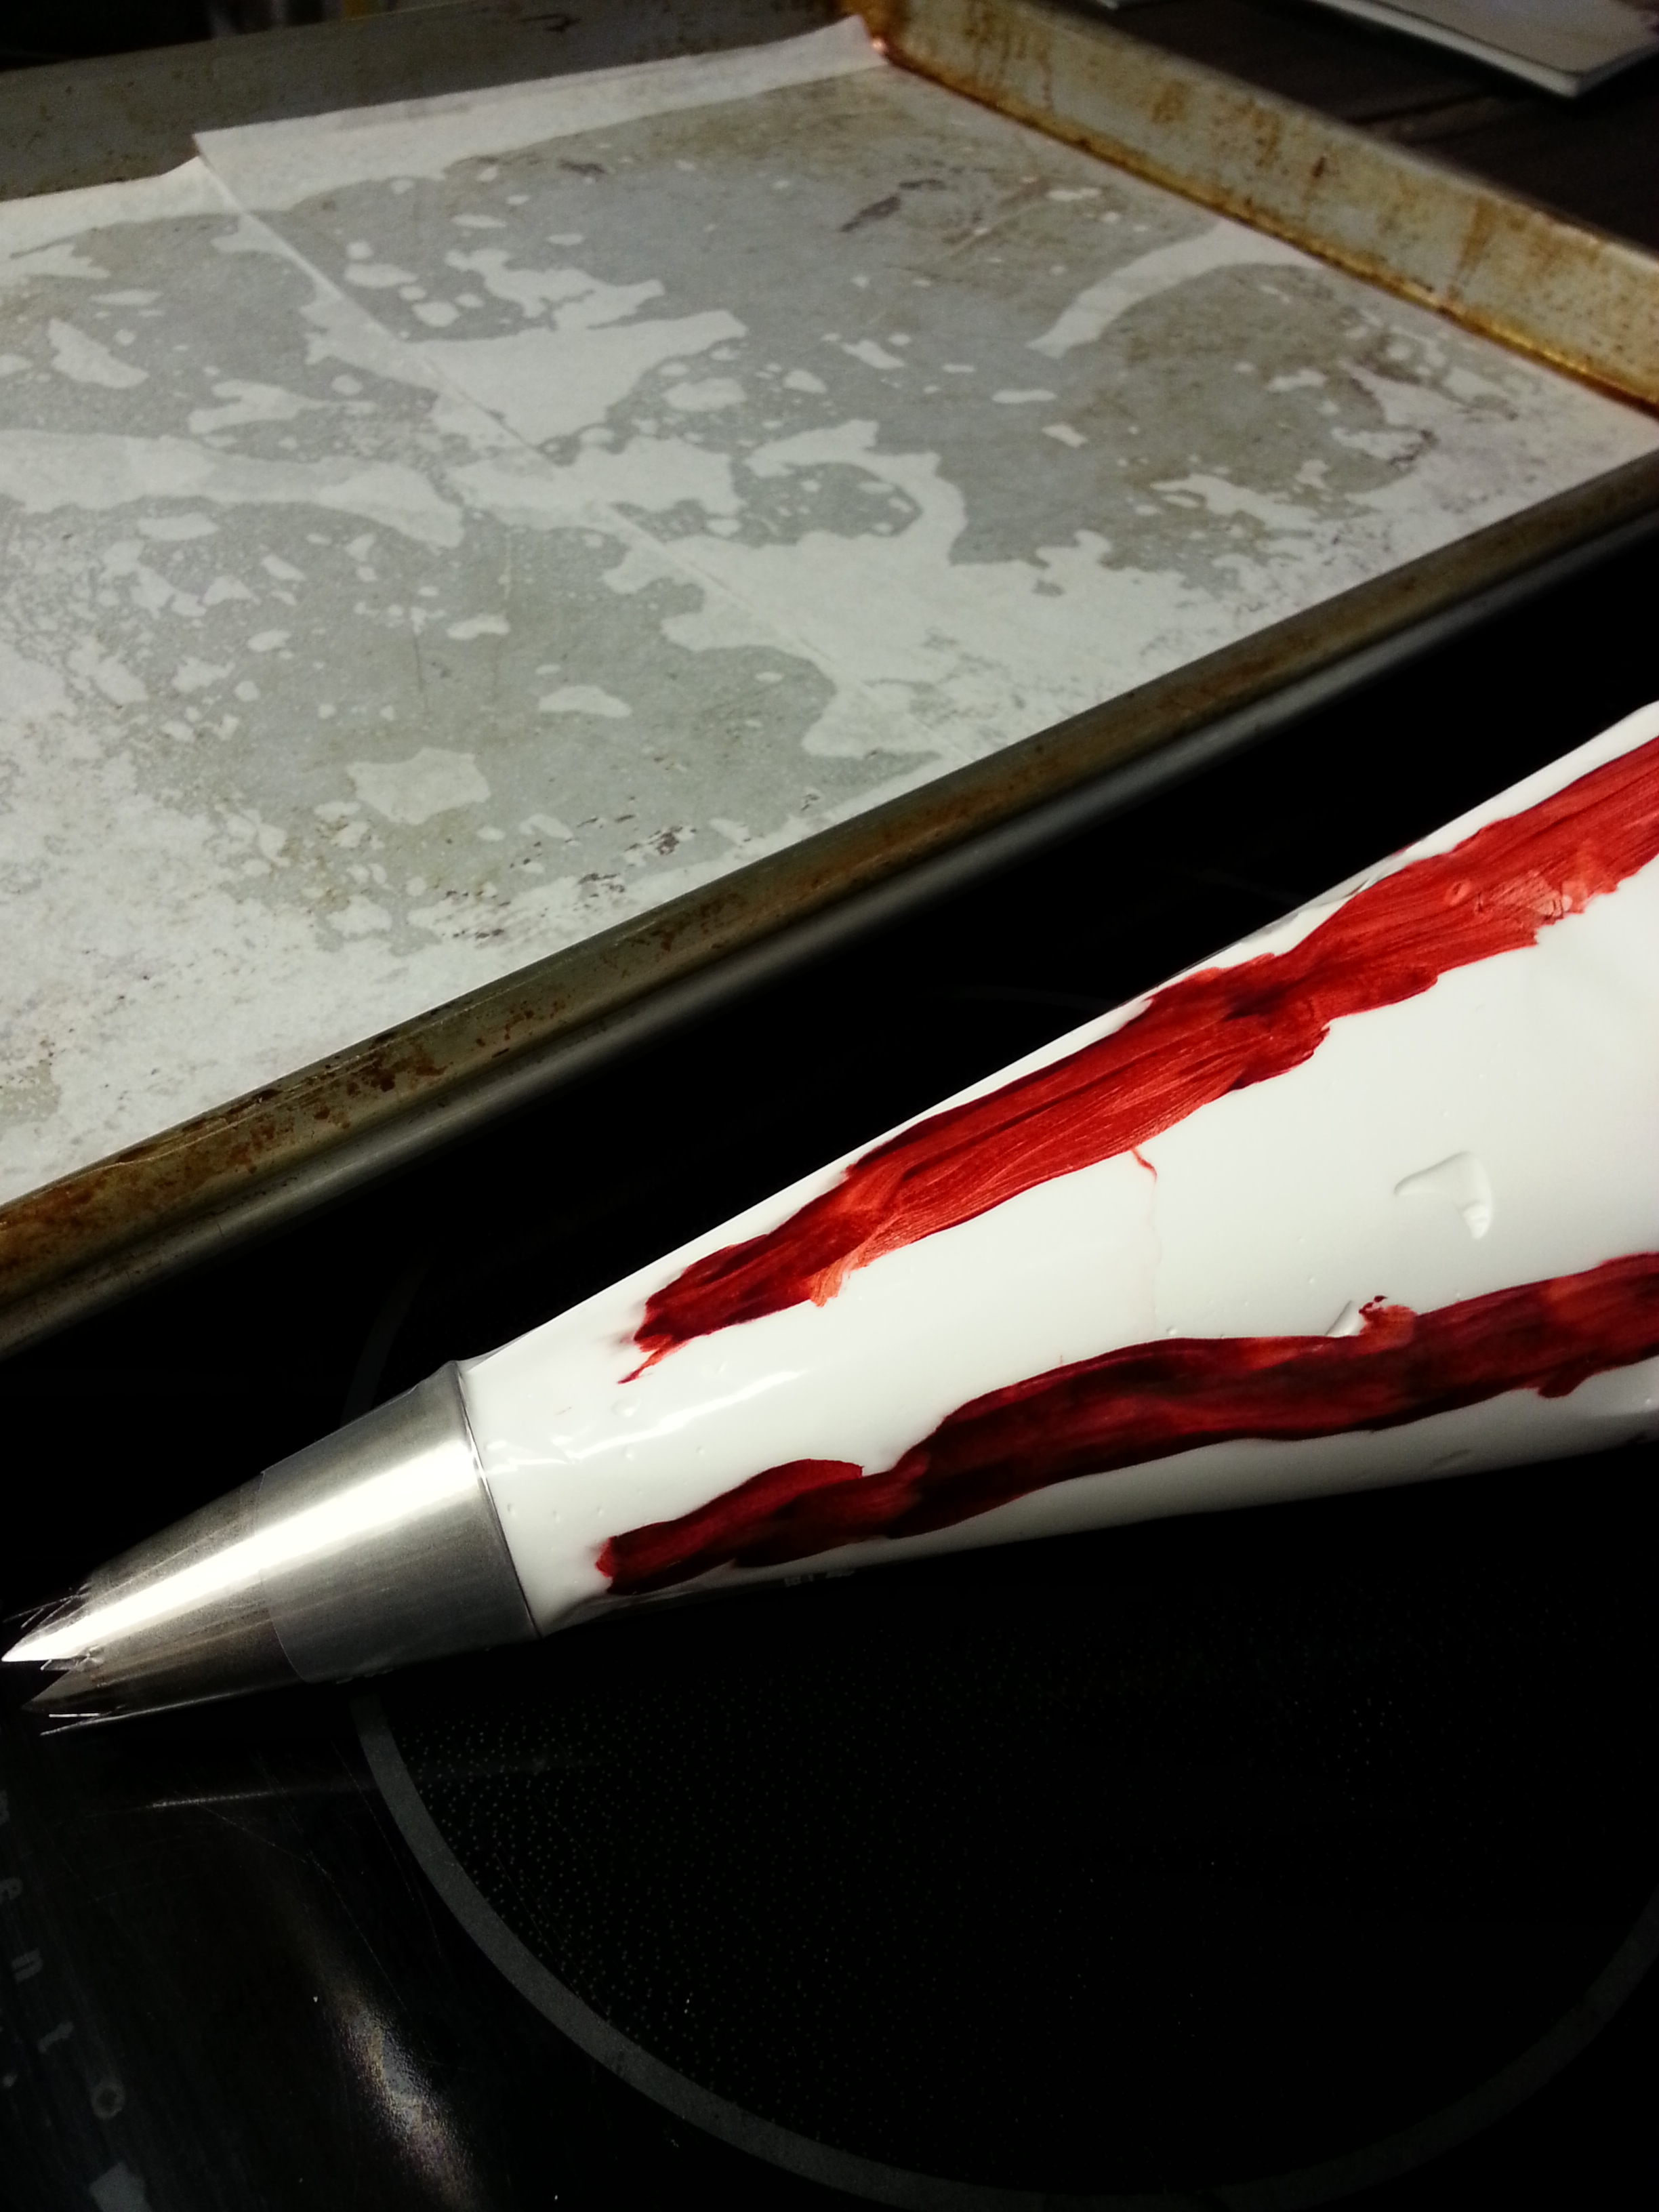
Carefully spoon the meringue into the piping bag (I was able to fit all my meringue in the one 18 inch bag), and squeeze a little of it back into the mixing bowl until you see the red starting to come out; the first little bit of meringue will still be white until it picks up the color that you painted in the bag.
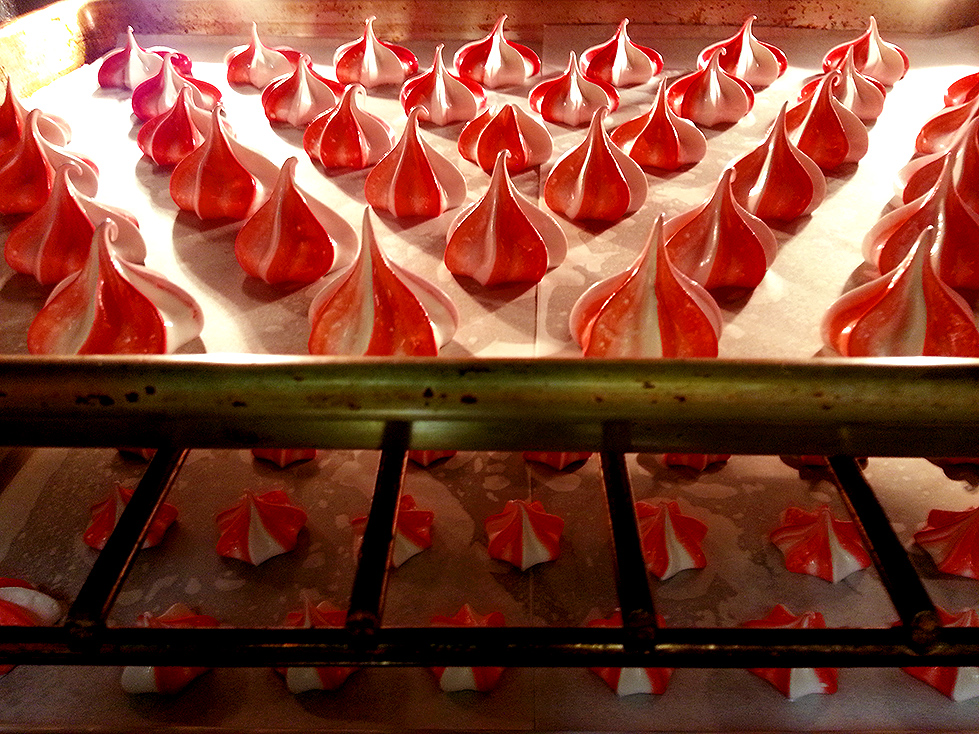
When the color starts to show, hold the bag perfectly upright over your parchment-lined sheet pan. With the star tip about a half inch from the surface of the pan, squeeze a small mound of meringue. Simultaneously stop squeezing while you pull the bag straight upward, to end up with a short little pointy end on the top of the star. Repeat in rows of 7 or 8 mounds until your entire sheet pan is covered. Pipe the rest of the meringue on the second sheet pan.


Place the two pans in the preheated oven and set your timer for 1 hour and 40 minutes. Yes, it’s a long time to wait for meringue goodness, but trust me! They’re worth it.
When the time’s up, you should have little, airy, crispy meringues. If you touch one and they still have a lot of give, throw the pan back into the oven for about 10 minutes. I ended up having to bake mine for at least another half an hour. I don’t know what the deal was, but I know my oven usually runs cool (I always compensate for the difference and use the suggested temperature, adjusted for my oven) so maybe that was why they took so long at such a low temperature. Nevertheless, what emerged from my oven was nothing short of lovely! The little meringues were light as a feather, bright and festive, crunchy all the way through, and lightly flavored with peppermint. I can think of very little in the way of sweet treats that would perfectly encompass wintertime and Christmas the way these little meringues do. They’re really very simple, and do not require much hands-on work. They’ll store beautifully at room temperature in an airtight container for up to one week. Don’t store them in the fridge or a humid environment, as it’ll make the meringues stale. I hope you try these, they’re just wonderful!


