This weekend was beautiful — it was cold and rainy. Some of you may think I’m crazy for calling a cold, rainy day beautiful, but living in Phoenix, those days are few and far between. We look forward to rainy, cool days the way Seattle residents look forward to sunny days. What better activity to partake in on a rare rainy winter day (other than snuggling up in bed!) than making cookies?


I stumbled upon this recipe from an old friend and former co-worker. Often times, gluten free baked goods just taste different, and usually contain lots of flour substitutes that can give them an off taste. Luckily for you, these little peanut butter cookies don’t contain any sort of flour, and just get by on peanut butter and egg to provide their structure. Hell, you could use some powdered egg substitute in place of the one egg and they’d be totally vegan! The peanut butter flavor is strong and rich, perfect for those who can’t get enough peanut butter. Aside from the sugar, they’re practically health food. I keep telling myself this as I glance at the ever-dwindling pile of leftover cookies on my kitchen counter… Just like Lay’s potato chips, you can’t have just one.
gluten free peanut butter cookies
(yields 34 – 1/2 oz cookies)
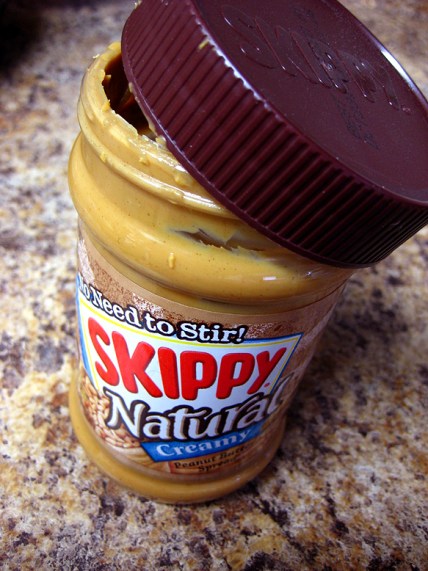
1 cup (260 grams) creamy or chunky peanut butter
3/4 cup (155 grams) white sugar
1/2 tsp (3 grams) vanilla extract
pinch of salt (about 1/8 teaspoon)
1 large egg
1 teaspoon (6 grams) baking soda
extra sugar, for rolling
6 tablespoons of jam, for filling the cookies
Preheat oven to 325 degrees. Spray two sheet pans with cooking spray and line with parchment paper. Set aside.
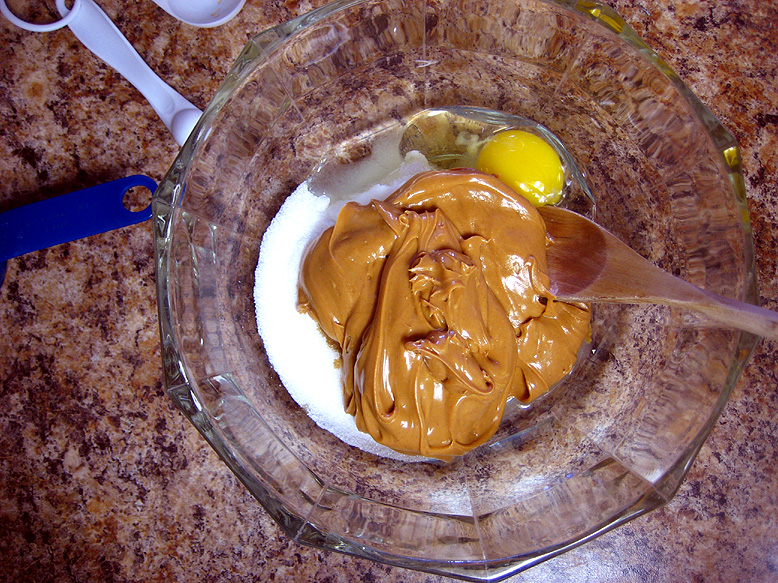
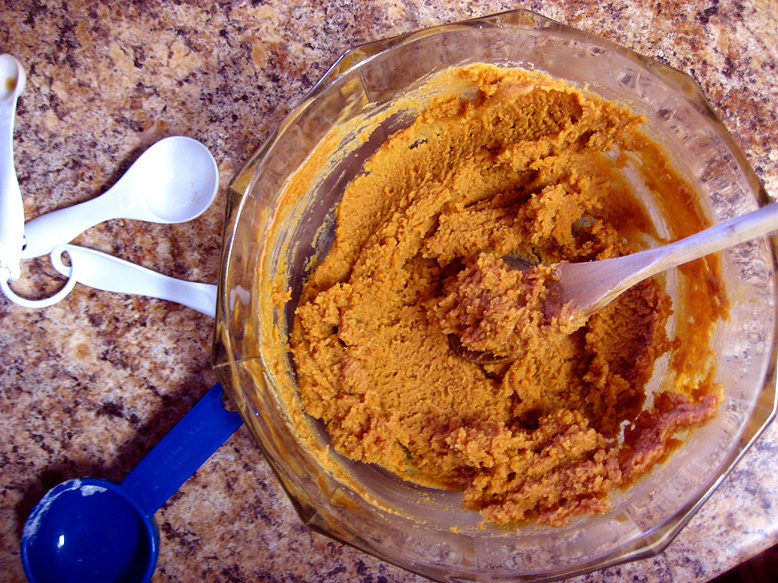
In a large bowl, mix together the sugar, vanilla, salt, egg and baking soda until smooth. Stir in the peanut butter with a wooden spoon. It will look too runny at first, but keep on stirring, and poof! The mixture will magically form a stiff dough. Science, bitches. It works.
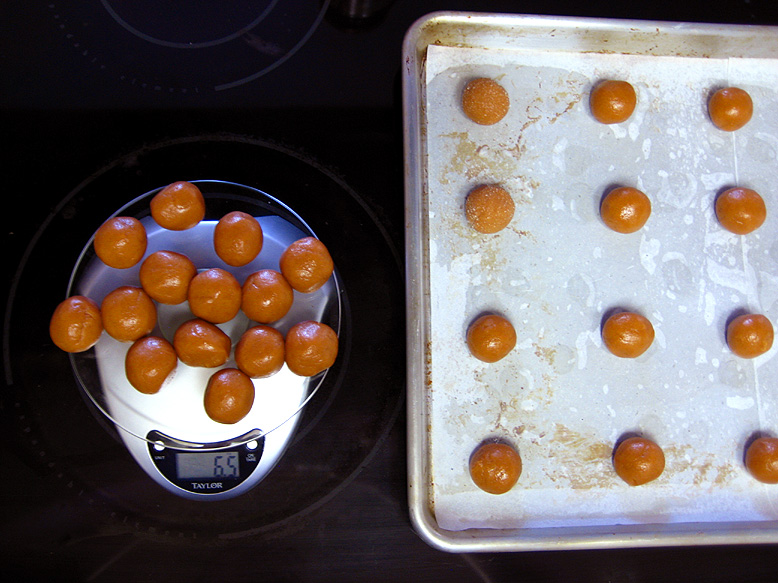
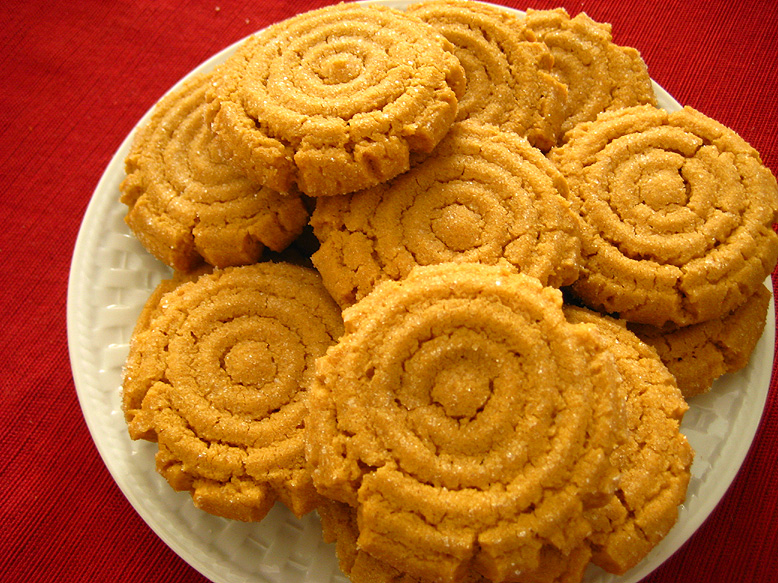
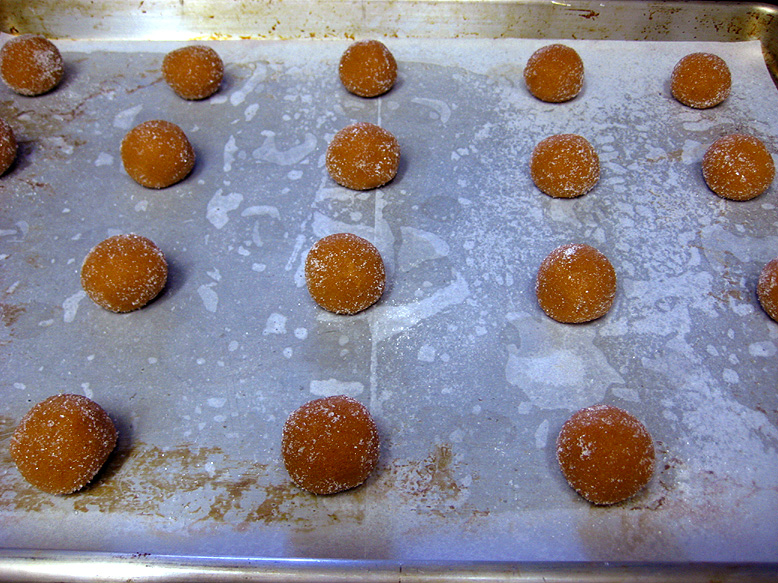
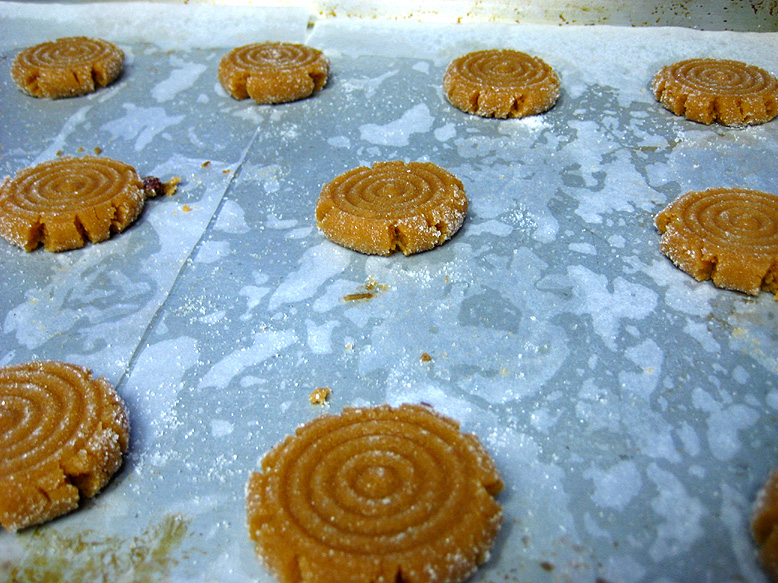
At this point, I busted out my trusty kitchen scale and rolled out little dough balls. I weighed mine at 1/2 an ounce each, or 14 grams. I’d guess they were slightly smaller than one tablespoon, but I didn’t really measure this so don’t quote me on it. Once the little dough balls are all weighed, put a few more tablespoons of white sugar into a bowl and roll around a few of the dough balls at a time until they’re fully coated. Place the dough balls on your lined sheet pans, about an inch or two apart. These don’t spread a whole lot, but I just like to have extra insurance that they wont run into each other and look all goofy. I was able to fit 20 on one pan without any problems.

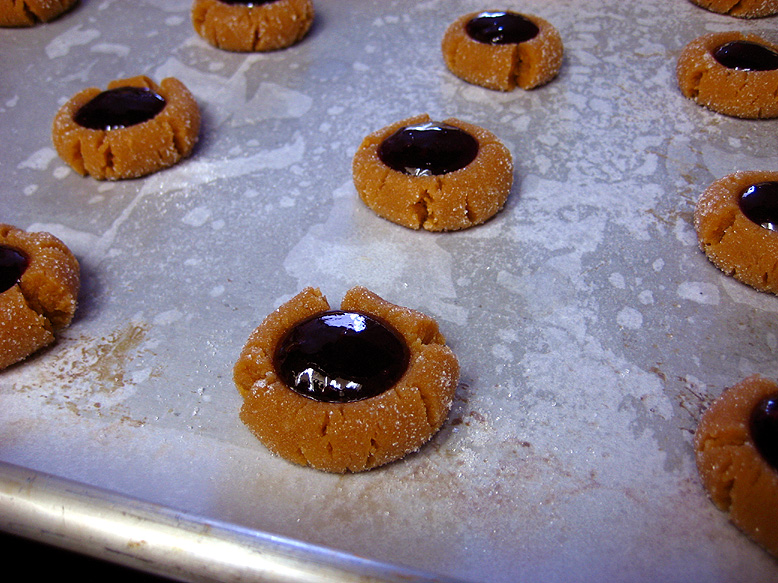
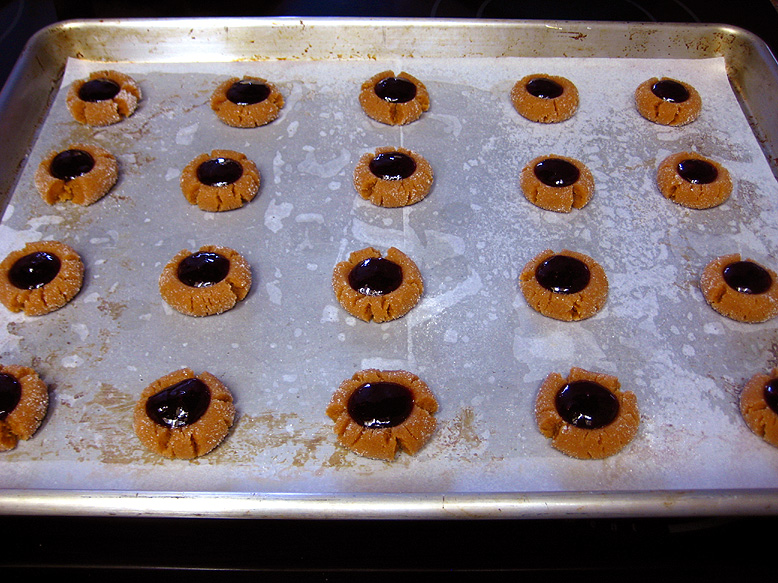
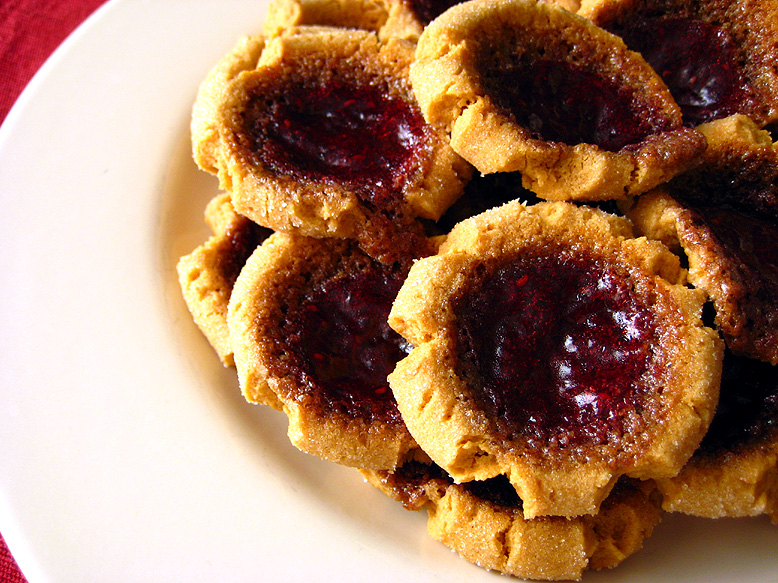
From this point you can flatten the cookies and bake them plain, or if you’re feeling kinda crazy like I was, you can fill them with seedless raspberry jam! Filled with jam, they become ultra cute peanut butter jammies. I imagine grape jelly would be good here, very classic school lunch-style. To prep the cookies for filling, I took the rounded back side of a teaspoon measure and pressed a divot into each ball. To make filling easier, I put about 6 tablespoons of jam into a Ziploc sandwich bag, cut off a small bit of one corner and squeezed about a half teaspoon of jam into each cookie. You want to be sure that the indentation in each cookie is pretty deep cause this jam will have a tendency to run all over the place once the cookies start baking.
Once all your cookies are filled (or just flattened, if you didn’t want to fill them), pop them into your preheated oven and bake ’em. I was actually using the convection setting on my oven, which will probably alter the baking time versus a non-convection oven. Mine baked for 18-20 minutes, but if you’re not using a convection oven you might want to start them out around 12 minutes and see how far that gets you. The cookies will still seem a bit soft when they’re done (if you press them, they will sink some), but they’ll firm up more as they cool. Just aim for light golden brown and dry-looking on the edges and you should be in good shape. The little jammies are quite fragile when warm, so they can cool on the sheet pan before they get removed.
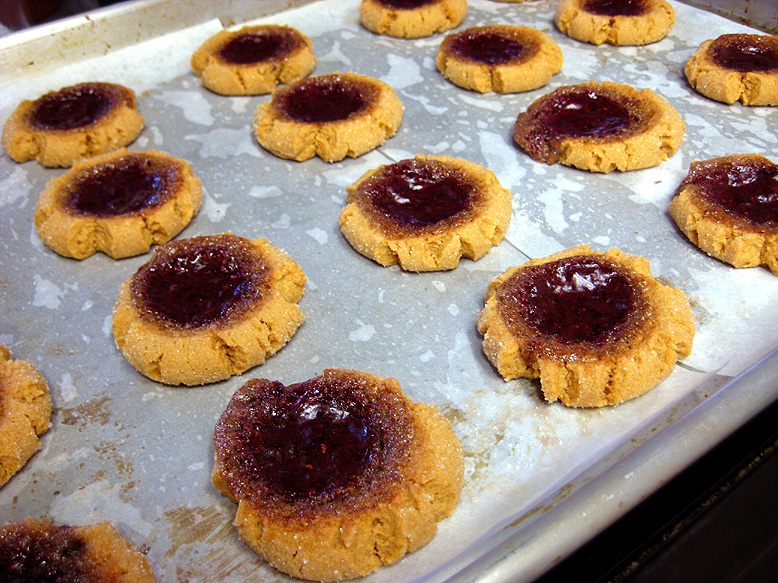

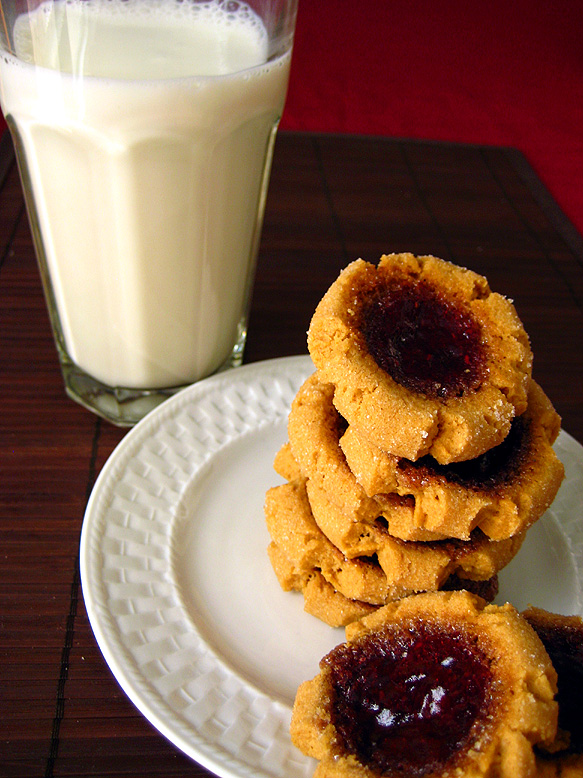
These little cookies are perfect when they’re warm from the oven. I honestly had a hard time not sneaking one every time I went into the kitchen, which was often. They’re tiny, too, which makes me feel like they’re not so bad for me. I suspect they’ll be gone by tomorrow, but if you have a little more self control than I do, then I think they could last up to a week in a sealed container at room temperature. They should also freeze spectacularly if you’d like to hang on to some of them for longer than a week. They go great with a tall, cold glass of milk, by the way.