

When my sisters and I were really little, our mom worked for a short time at a donut shop. She would go to work in the afternoon when my dad would get home from work, and my sisters and I were always asleep by the time she’d get home late that night. As if by magic (so it seemed to my little kid brain), every Sunday there would be a pink bakery box on the kitchen table when we woke in the morning, with a donut inside for each of us!
Lindsey’s favorite was always the raised donut with pink frosting. Jessie got an apple crumb donut without fail. My donut of choice? Chocolate cake with chocolate frosting and those little rainbow nonpareils on top. Always and forever.
Now, I’m not much for donuts these days. I like to think that I have a more refined palate than I did when I was pushing 5 years old, so the boring, greasy donuts from the grocery store’s bakery case hold little appeal. It’s hard to find a good one, and even when I do eat one, I’m left staring at the crumbs on the plate with a heavy feeling in my gut because I just consumed a ton of fat-laden sugary goodness all packed into a relatively small pastry. The benefits do not outweigh the risk, in other words.
I’m not that trepidatious when it comes to donuts in general. Just the bad ones. I’ve made some really awesome donuts in my own kitchen, and that’s the best place to make them, really. You can control just what goes into them (or what doesn’t), and make them somewhat healthier than the vegetable shortening-soaked donuts down at the Safeway. In the case of those apple cider curd-filled ones, they weren’t very healthy. But, thanks to the invention of donut-baking pans, you can have your donuts and eat them, too!
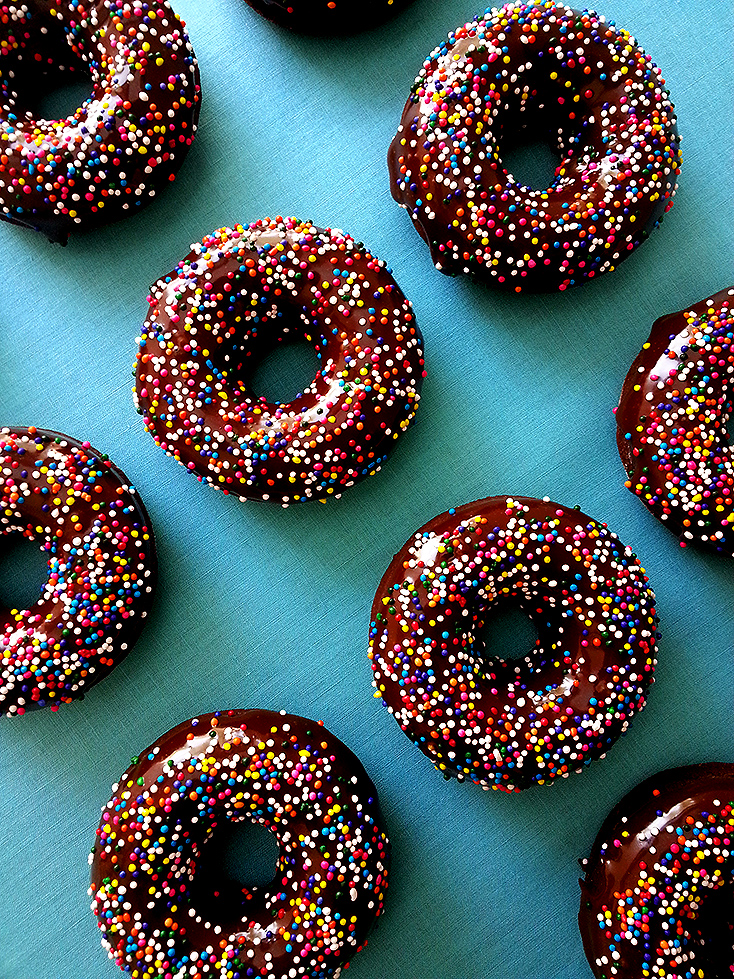
I bought a donut pan at Target a while back, and sort of forgot about it. As the new year rolled around, I (like countless others) tried to adopt healthier eating goals. I was craving the donuts of my childhood without all the hassle implied in a 6 quart pot of hot oil, so the donut pan came to the rescue and allowed me some mighty tasty chocolate donuts! They weren’t complete without a chocolate icing, and a salted milk chocolate ganache was the perfect thing to temper some of the sweetness. And rainbow sprinkles. Obviously.
baked chocolate donuts with
salted milk chocolate ganache
(yields 13 – 3″ donuts;
donut recipe modified from this one)
donut dough:
2 eggs, room temperature
2/3 c (165 g) granulated sugar
2 tsp vanilla extract
2 1/4 c (293 g) all purpose flour
3/4 c (97 g) cocoa powder
1 Tbs baking powder
3/4 tsp kosher salt
1/2 cup (113 g) vegetable oil
1/2 c (130 g) buttermilk, slightly warmed
rainbow nonpareil sprinkles, for decorating
salted milk chocolate ganache:
4 oz good quality milk chocolate
1/4 c (2 oz) heavy cream
1/8 tsp kosher salt
Hopefully you have two nonstick donut pans at the ready [if you only have one, that’s fine, just bake a batch at a time], and hopefully you’ve also greased them lightly with cooking spray! Set them aside and preheat your oven to 375 degrees. It’s time for donut dough!
To ensure that the eggs are room temperature, you could always just plan ahead and leave them sitting out for an hour or so before you crack them, but I seldom have the foresight to do such a thing. In this case, place the fresh-from-the-fridge uncracked eggs into a measuring cup or bowl and fill it with hot tap water so that the eggs are submerged. Let them sit for 5 minutes or so, and they’ll be just right. Also, to warm your buttermilk, place your 1/2 cup of buttermilk in the microwave and heat on high for about 45 seconds. Add the vegetable oil to your warmed buttermilk and set it aside.


In the bowl of a stand mixer, crack the room temp eggs and add the sugar. Using the paddle, beat the eggs and sugar on medium-high (speed 7) for 3 minutes. By now you’ll have thick and pale yellow eggs and sugar. Add the vanilla and beat for a few seconds more to incorporate it. Meanwhile, while the eggs are doing their thing, measure your flour, cocoa, baking powder and salt into a medium sized bowl. Whisk by hand to get rid of any lumps, and when your eggs are sufficiently beaten, go ahead and add half of this flour/cocoa mixture to the bowl. Mix it on low (speeds 1-2) until it’s mostly incorporated, and scrape the bottom and sides of the bowl well. With the mixer running on low to medium speed, stream in your warm buttermilk/oil mixture and let this mix in until smooth. Once again, scrape the bowl well and add the second half of your flour mixture. Mix on speed 1-2, turning up a little higher if necessary, until you end up with a smooth dough. It’ll be pretty soft, basically verging on a thick batter, but that’s what we want!


On a clean and lightly floured surface (or a Silpat, my favorite), scoop out the donut dough and pat it out by hand to a thickness of about a half inch. You could use a rolling pin to do this, but I found that I was a little heavy handed and accidentally rolled the dough too thin this way. D’oh! Grab a 3 inch cutter and cut out as many donuts as you’re able to with this first roll. To cut out the centers of the donuts, I found that using the big end of a medium sized pastry tip will do the job just fine.


Once you have the donuts cut out, place one in each greased cavity of the donut pan, pressing them down gently to fit the shape of the pan. Gather up the dough scraps, including the rounds you punched out of the centers, and pat them out to another 1/2 inch piece. Cut out more donuts and punch out their centers, pressing them into the second greased donut pan (or just let them sit there until the first batch it baked and cooling). Once the donuts are ready, put them into your preheated oven and bake for 8 minutes. When they’re done, the donuts should have some cracks on the top, and not hold an indentation when pressed lightly with your finger. If they feel too soft or if pressing your finger on top leaves a mark that doesn’t go away, bake them for an additional 2 minutes. Let them cool just a bit and then lift them out of the pan onto a baking rack, with the top side facing down and the pan side facing up. Repeat with your second batch of donuts if you didn’t have two pans.
While the donuts are cooling, whip up the tasty ganache! Put your chocolate, cream and salt into a medium microwave-safe bowl and heat for 30 second increments, stirring after each one, until the chocolate is melted and warm. Whisk gently to combine the chocolate with the cream, increasing your speed once the cream is incorporated, to ensure a smooth and emulsified ganache.


One by one, carefully dunk the cooled donuts pan-side down into the warm ganache, going halfway up the sides of each donut. Place them back on the cooling rack and once all the donuts are dipped, sprinkle them with a little (or a lot!) of the rainbow nonpareils. Don’t want to use them? They’d be great sprinkled with chopped nuts, coconut, other sprinkles, or even cocoa nibs. Yum!


These are obviously best when eaten fresh, but if you must store them before eating, keep them in an airtight container at room temperature for no more than 2-3 days. After this, the texture tends to suffer a bit. To get the taste of a freshly made donut even when they’re a couple days old, pop one into the microwave for about 10-15 seconds. Mmmm, warm chocolate donuts! And hey, they’re baked and not fried, so you don’t have to feel a massive amount of donut-eater’s remorse. Win-win-win! Bring these donuts to all your friends who are in the middle of their New Years diet resolutions, and if they start to protest that you’re crazy, that they can’t possibly eat a chocolate donut, but do you have a kale smoothie instead?, shove one into their mouths. They’ll thank you when they finish chewing, I promise.


Reblogged this on Foodie and commented:
Want to make something sweet for your valentine? Here’s a great recipe for backed chocolate donuts!
I made these yesterday but made them in a mini donut (24 small ones) and they were so dry, we couldn’t eat them. Not sure if making them smaller changed it somehow.
Any thoughts?
I’m so sorry they didn’t turn out, Deb! :( Did you reduce the baking time? They would need less time than the larger ones.
Also, Deb, I’ve just modified the recipe to include vegetable oil instead of melted butter in the donut dough. It should make for a more moist donut all around. I hope you try these again! :)