I have what you’d call a little obsession with the little French cookie known as the macaron. There’s just something so alluring about these cookies to perfectionist bakers because it’s so technical a cookie to produce. Anyone can make a macaron, but to make a good one, the technique has to be perfected and you have to be present in the moment with these guys. This is no time to go into the kitchen and do a half-assed job. Use your whole ass!

For a few years now, whenever I’ve made macarons, I’ve always relied on the recipe from Stella Parks, aka Brave Tart. Lots of other people love it too, cause Stella has smashed a lot of macaron myths, making these cookies pretty simple to master. Still, there are times when macarons can confound you. For me, this was one of those times.
I wanted to experiment by making a nut-free macaron. Usually these cookies are made with almond meal (finely ground, skinned and blanched almonds), which is all well and good for most people. If you have a nut allergy though, macarons are pretty much off limits to you. I thought I’d try using fine shredded unsweetened desiccated coconut in place of the almond meal, which I thought would be pretty successful. My thought process was, the almond meal in the macaronage (macaron batter) is there mostly for bulk, and it doesn’t absorb liquid. I didn’t figure the desiccated coconut would behave any differently. I made sure to buy unsweetened specifically, so there wouldn’t be any screw ups from added sugar. The coconut didn’t process as finely as almond meal would have, but still, all looked well when the batter was mixed. Don’t judge a book by it’s cover, I guess! While the macarons ultimately turned out delicious, I hit a few snags along the way.
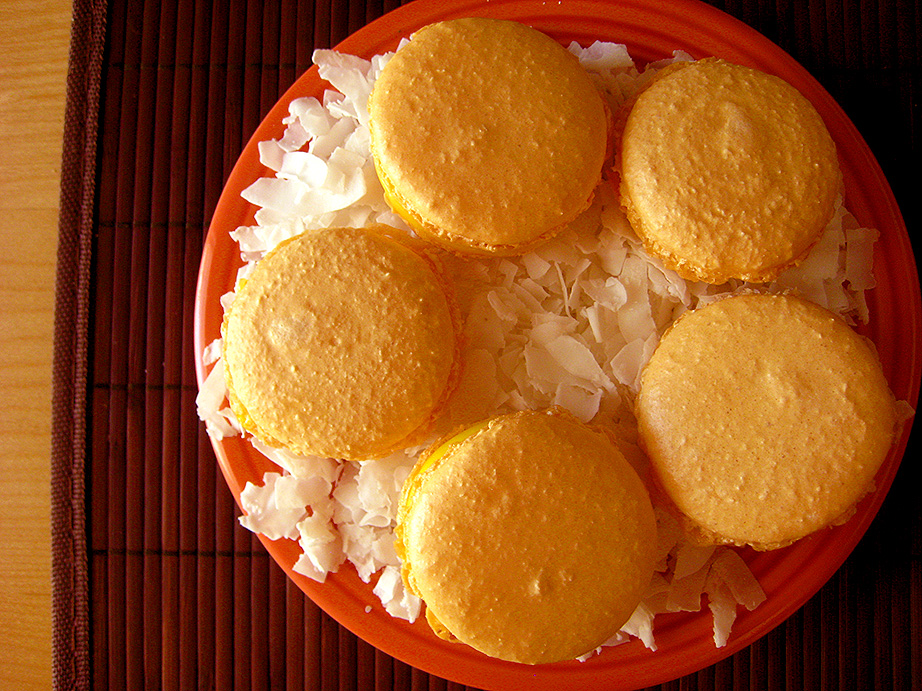
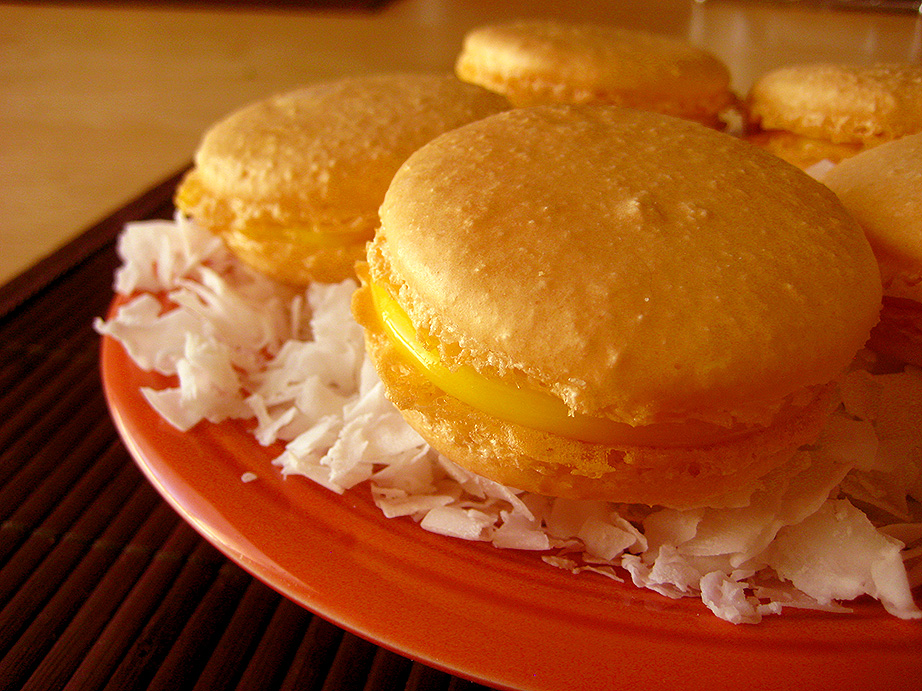
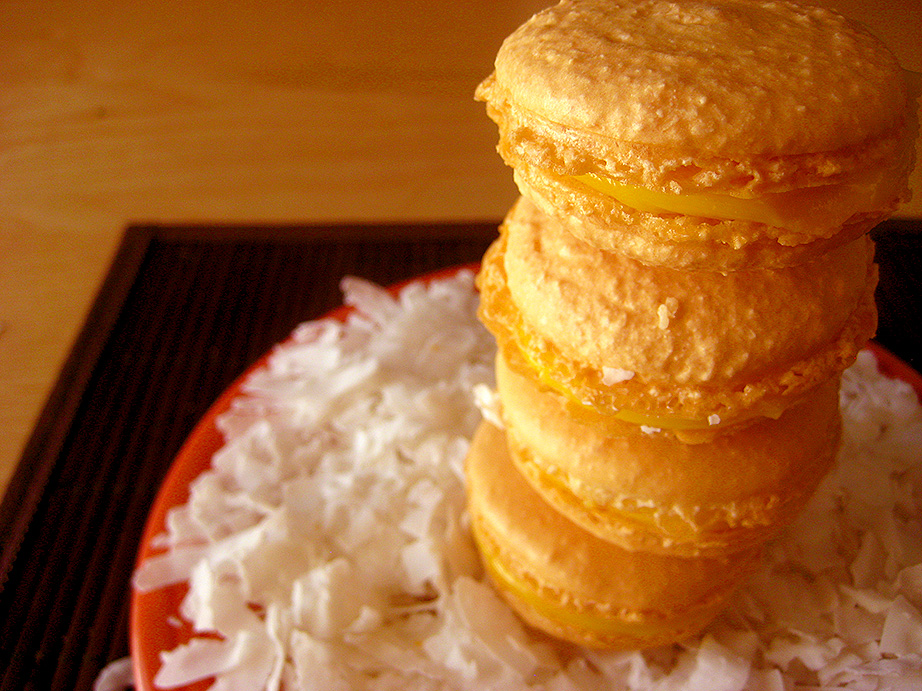
nut-free coconut + pineapple macarons
(yields 16 sandwich cookies)
pineapple curd filling
adapted from Luscious Lemon Desserts by Lori Longbotham
1/2 c (4 oz) unsalted butter
3/4 cup (160 g) granulated sugar
1/2 cup (122 g) 100% pineapple juice (I used Dole in the big can)
pinch of kosher salt
6 egg yolks
2 tsp (6 g) cornstarch
2 Tbs (28 g) lemon juice, divided
nut-free macarons
adapted from Stella Parks’ recipe on bravetart.com
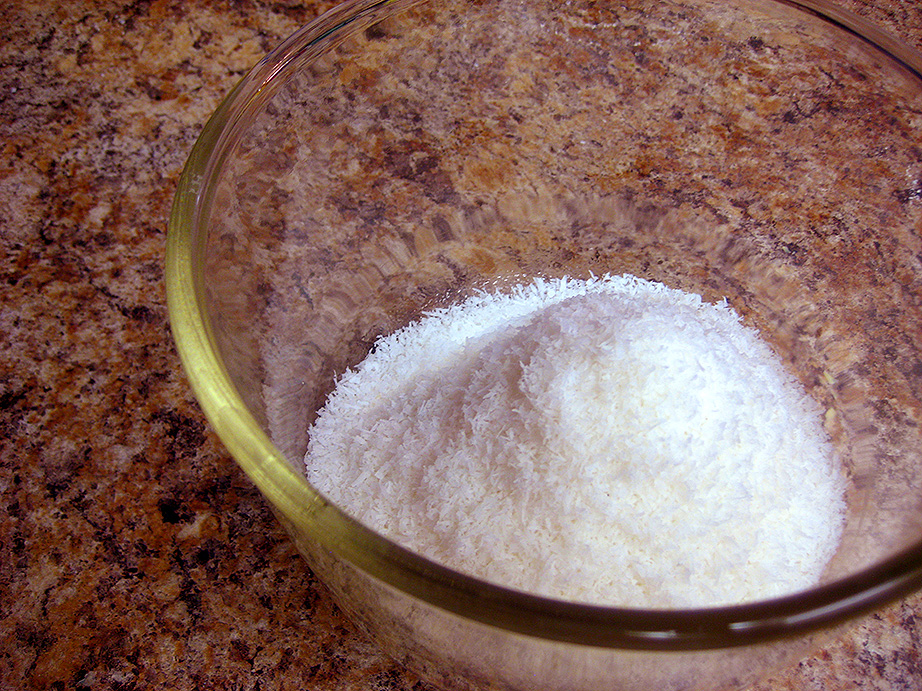
115 g unsweetened desiccated coconut
230 g powdered sugar
144 g egg whites (about 4 eggs’ worth)
72 g granulated sugar
2 g kosher salt
1 tsp vanilla extract
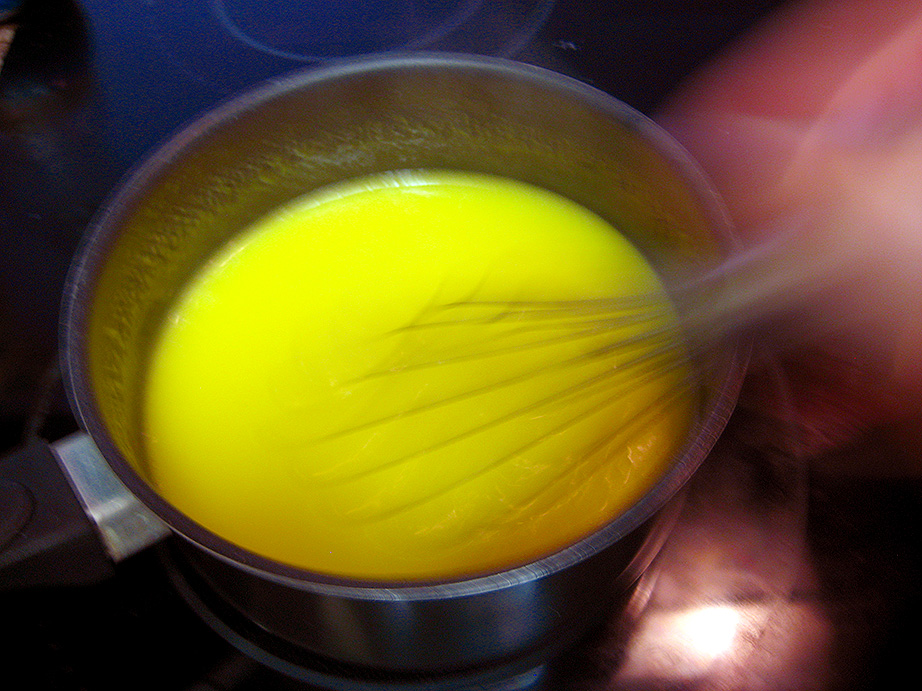
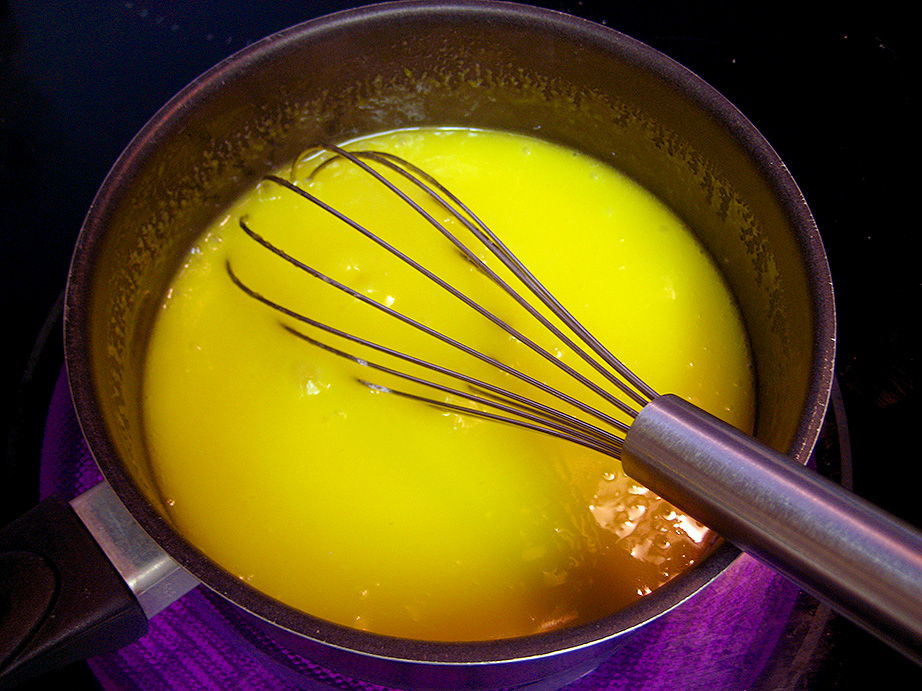
To make the pineapple curd: Melt butter in a sauce pot over medium-low heat. Remove from the heat and whisk in the sugar, pineapple juice, salt, cornstarch and 1 tablespoon of the lemon juice. Whisk in the egg yolks until they’re smooth and combined well. Cook over medium-low heat, whisking constantly, until the curd thickens and starts to bubble, 5-7 minutes. To make sure it’s done, dip a spoon into the curd and draw a line down the back with your finger. Hold the spoon sideways. It’s done when the line you drew leaves a path that doesn’t get filled in with runny pineapple curd. Remove from the heat and stir in one more tablespoon of lemon juice. Strain the curd if you want, and pour it into a bowl. Cover the surface of the curd with plastic wrap and leave in the fridge for several hours or overnight. You want the curd to be cold and firm, not runny. Let’s make the macs!

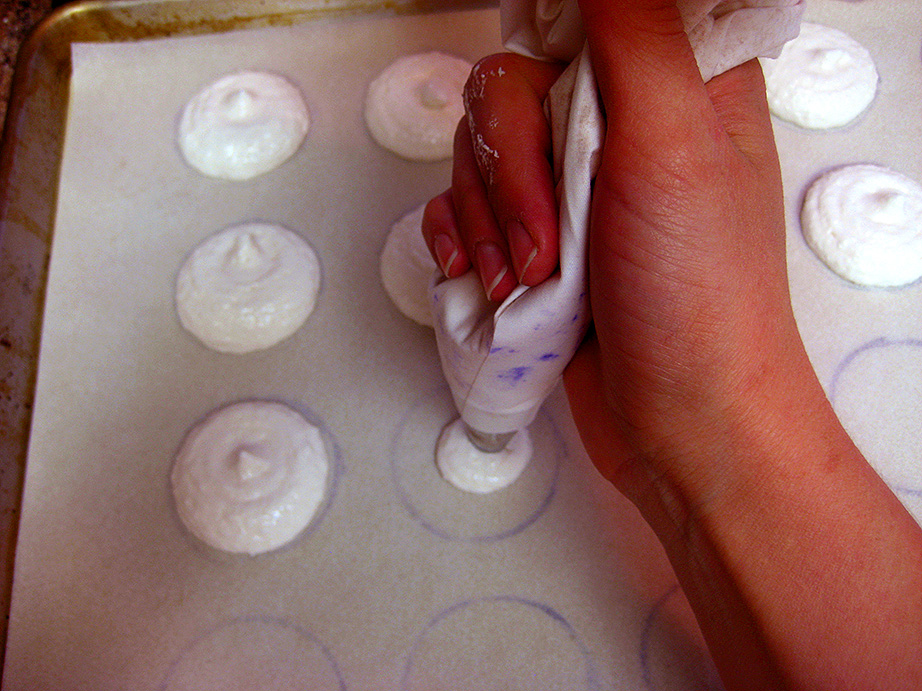
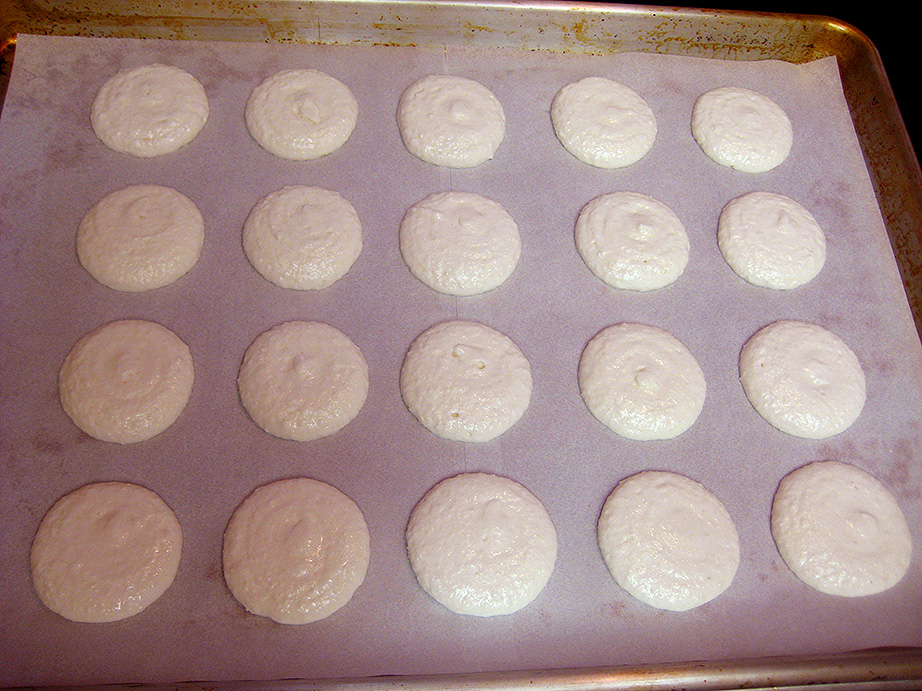
Preheat your oven to 300 degrees. Grab two sheet pans and some parchment paper, tracing 2 inch circles (use a round cutter or small lid) on two pieces of paper with a Sharpie, spaced apart a bit, until you have 16 circles on each piece. Turn the papers over so the Sharpie marks are face down on the sheet pans, and set it all aside. Gather a large (18 inch is good) piping bag fitted with a plain round tip (Ateco #806 works perfectly) and set that aside too.
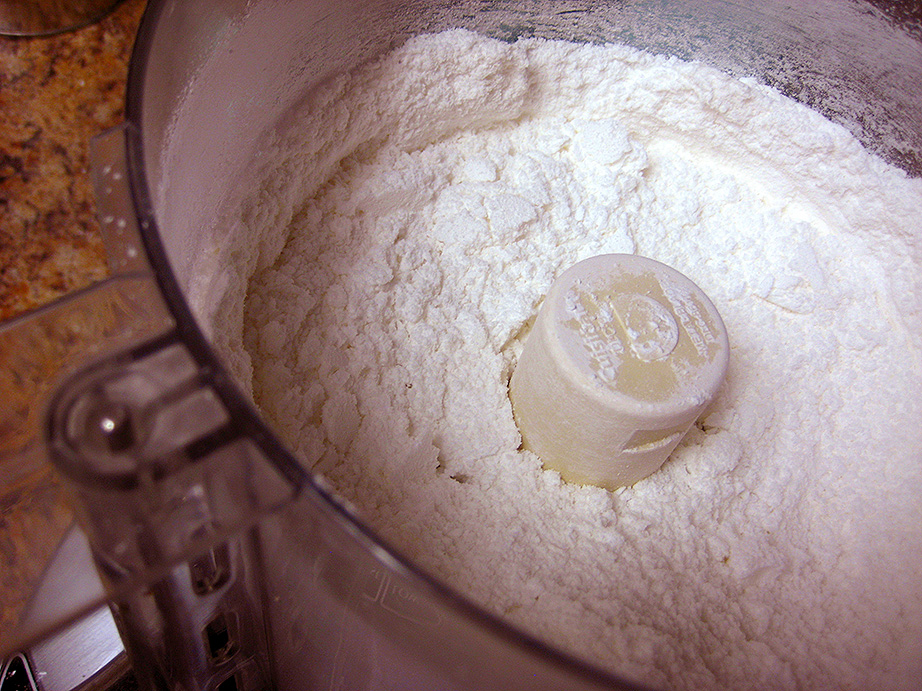
To make the macarons: In a food processor, combine the powdered sugar with the desiccated coconut. Pulse a few times until it’s all well mixed, dump it into a bowl and set it aside.
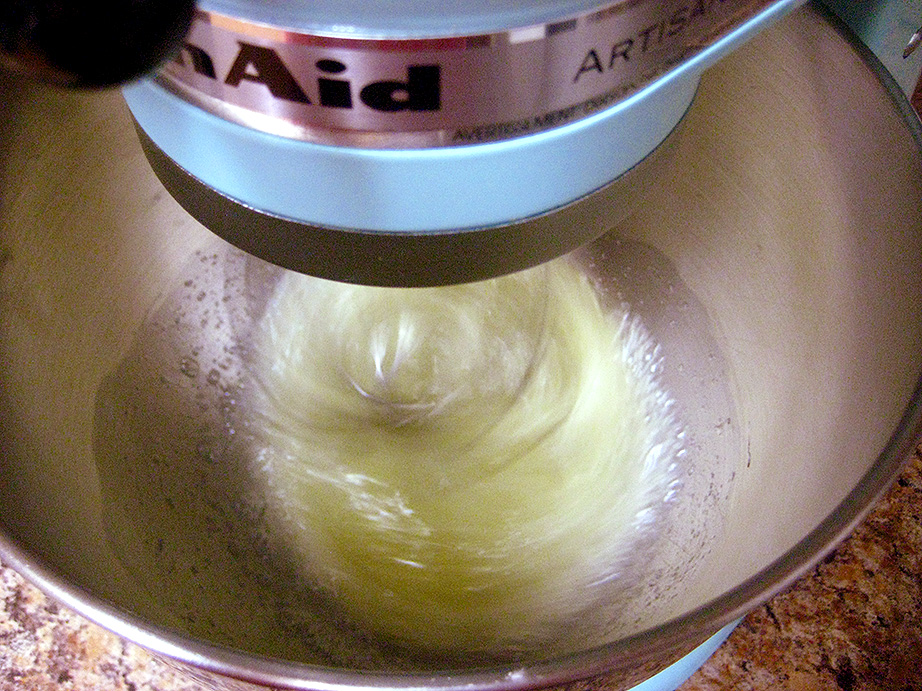
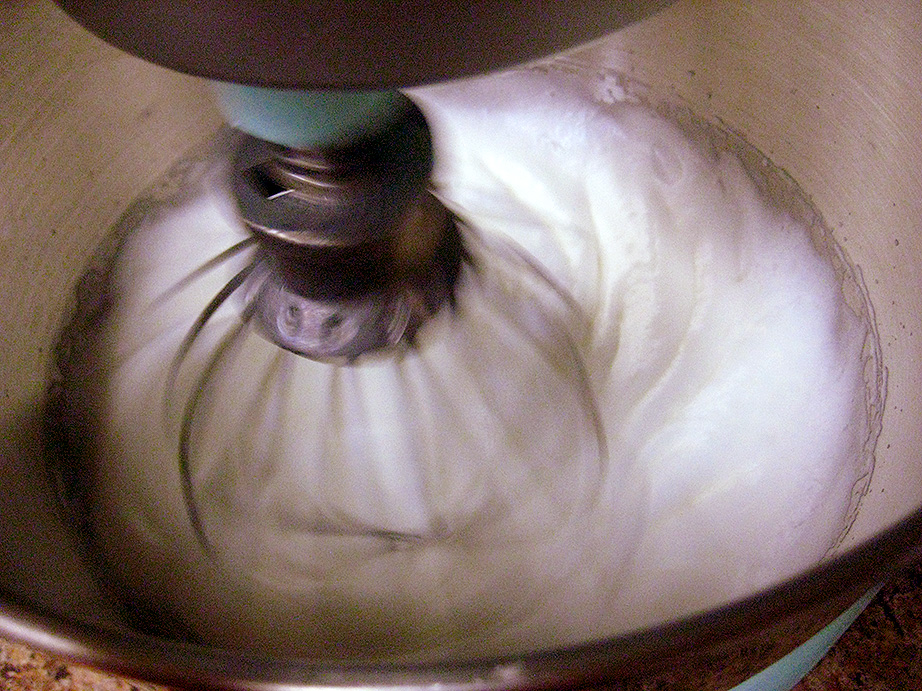
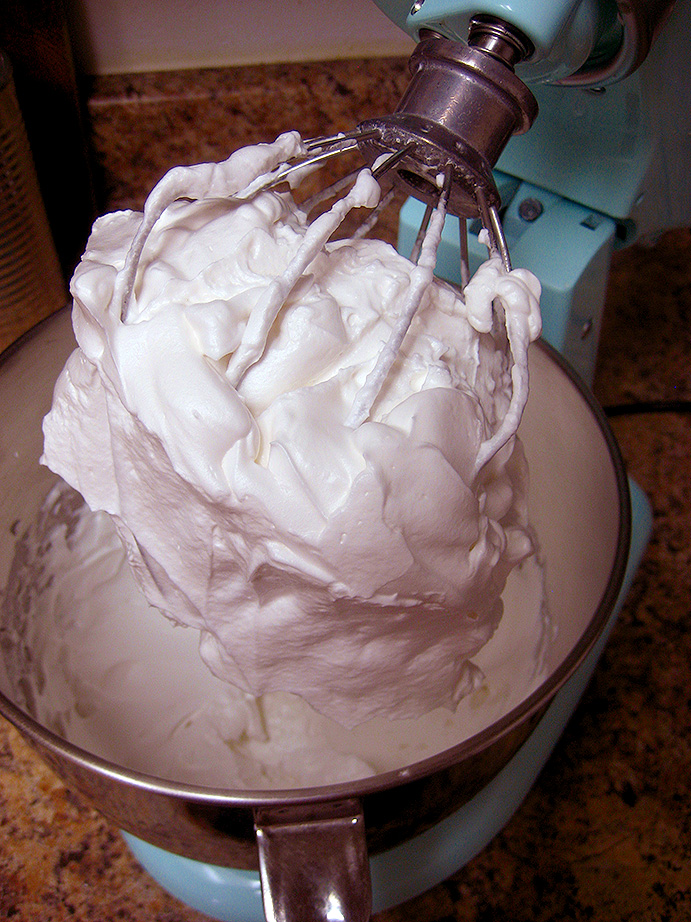
In a stand mixer bowl, pour your egg whites, granulated sugar and salt. With the whisk attachment, whip this egg white mixture on medium speed (Kitchen Aid speed 4) for 3 minutes. It won’t look like much now, just kinda foamy and bubbly. Increase the speed to medium-high (Kitchen Aid speed 7) for 6 minutes. The egg whites should be thickening by now. After the 6 minutes, add the vanilla extract and beat again on high (Kitchen Aid speed 10) to make sure everything’s all well mixed. By now, you should have big, billowy, fluffy piles of meringue that hold very stiff peaks. The meringue should clump inside the whisk when it’s ready.
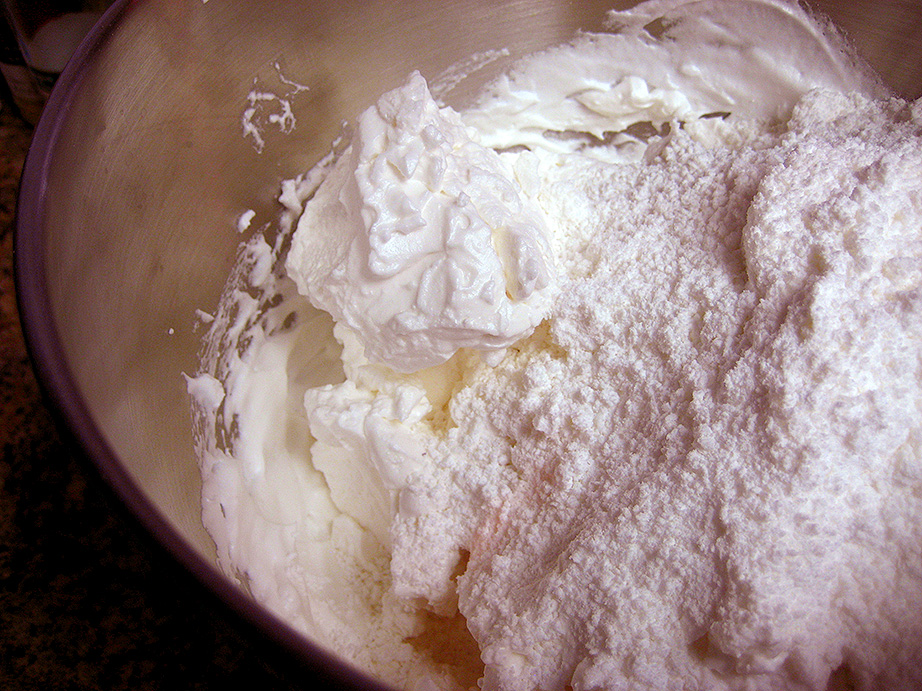
Now’s the important part, mixing the macaron batter! Take the mixing bowl from the stand and add all the powdered sugar/coconut mixture at once. With a rubber spatula, fold the dry mixture into the meringue, going about 40 or 50 “strokes” or folds. Make sure as you go along, to scrape the spatula and sides of the bowl clean of any errant meringue that’s left behind, so that it all gets fully mixed into the batter. When the batter is ready to pipe, it should be fluid like lava, some say a “molten” consistency. It shouldn’t be so thick that a scoop of batter won’t flatten out after about 20 seconds when dropped into the rest of the batter, but you also don’t want it over-mixed and too runny. It’s a learning process for sure, and it’s easier to recognize when the batter is ready if you’ve made macarons a few times.


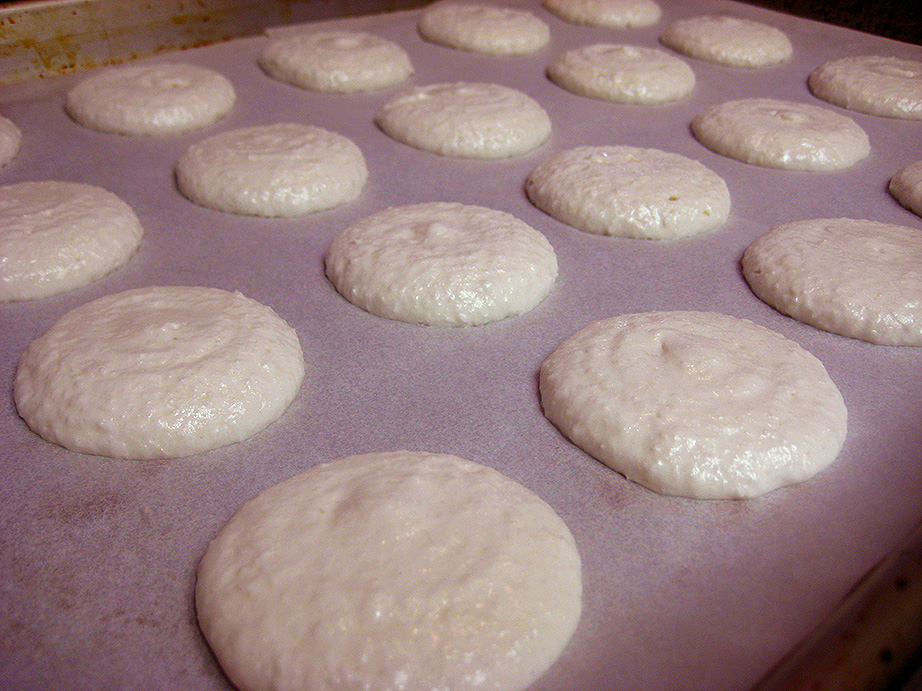
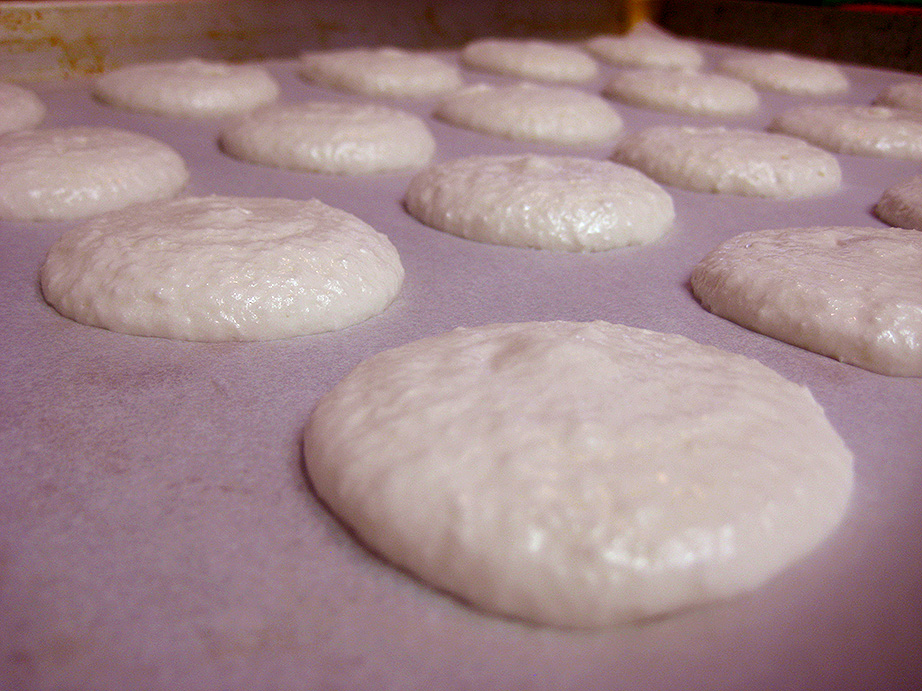
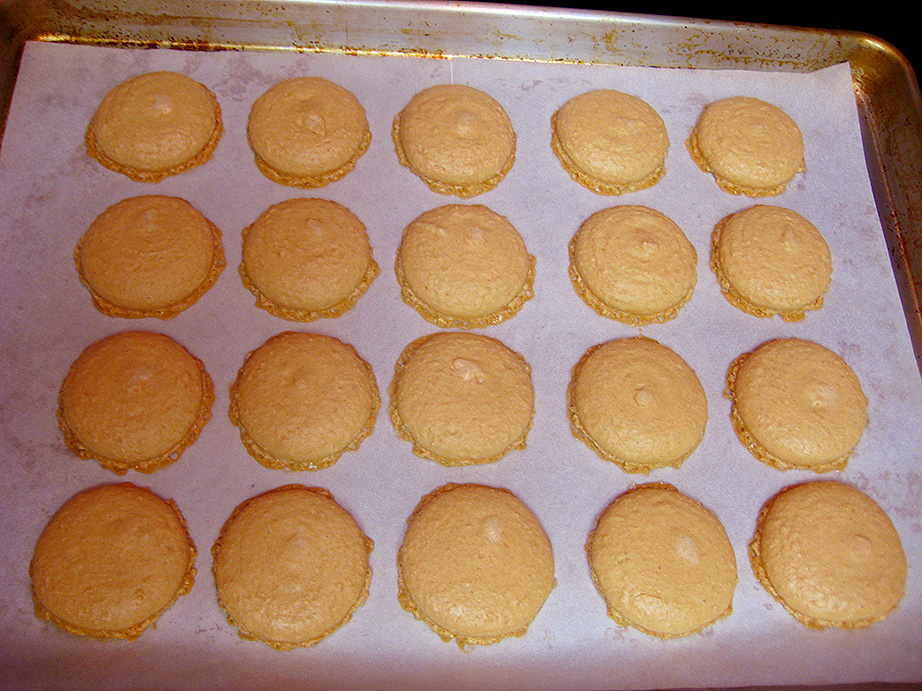
Once the batter is mixed well, scoop some into your piping bag so it’s about half full (an overfilled piping bag will be way too hard to pipe neat circles). On your parchment paper with the traced circles, hold the piping bag upright about a quarter inch from the paper and squeeze out the batter so it fills the circle almost to the edge. You want to stop piping before the batter meets the edge of the circle cause they’ll flatten out a bit when they settle. Keep piping circles on the first pan. Any remaining batter can be kept in the piping bag, or your mixing bowl covered with plastic wrap while the first pan is baked. When you have the first pan piped, grab it firmly and smack it down hard on the countertop a few times to pop any larger air bubbles that could cause the macs to crack.
Put the pan on the top rack of your preheated oven and bake the cookies for 18 minutes. I don’t know why, but my cookies took like a half hour to be fully done. The batter, when piped, was stark white and the cookies were in the oven so long that they picked up a golden color. The texture of the finished macs was also kinda gummy, but perhaps you’ll have more luck than I did. It could have been a problem with the coconut versus the almond meal, but I’ll have to make them again sometime to figure out the problem. Either way, check the cookies for doneness after 18 minutes. They should be firm to the touch and should not move side to side when touched cause this means they’re underbaked. If you think they’re done, try to gently peel one off of the parchment. If it comes off cleanly, you’re golden! And hopefully your macs have feet, too! 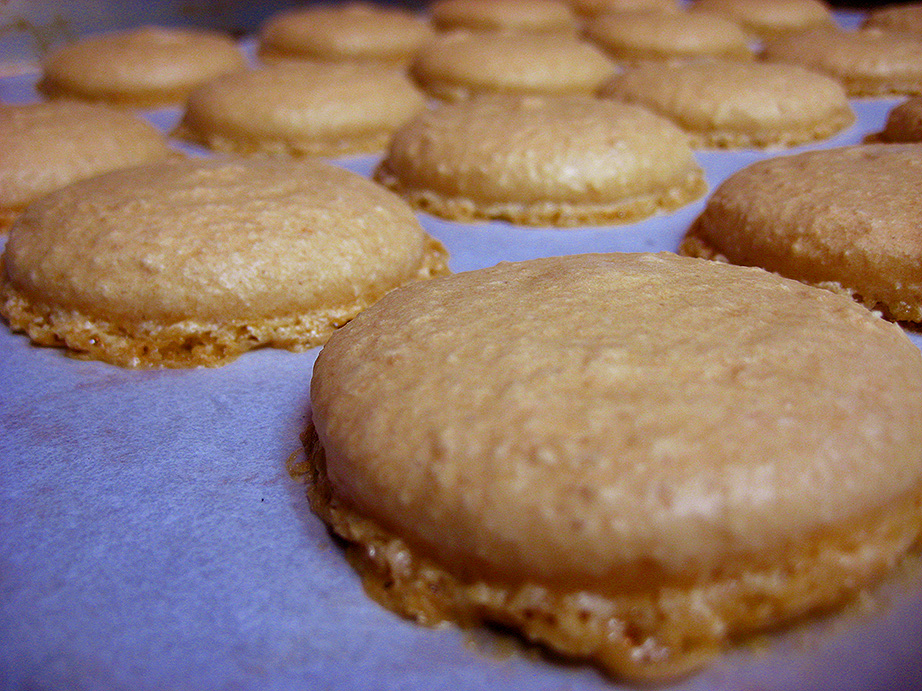
Once the first pan is done baking, pipe your second pan in the same way as the first, and bake the second pan until done.
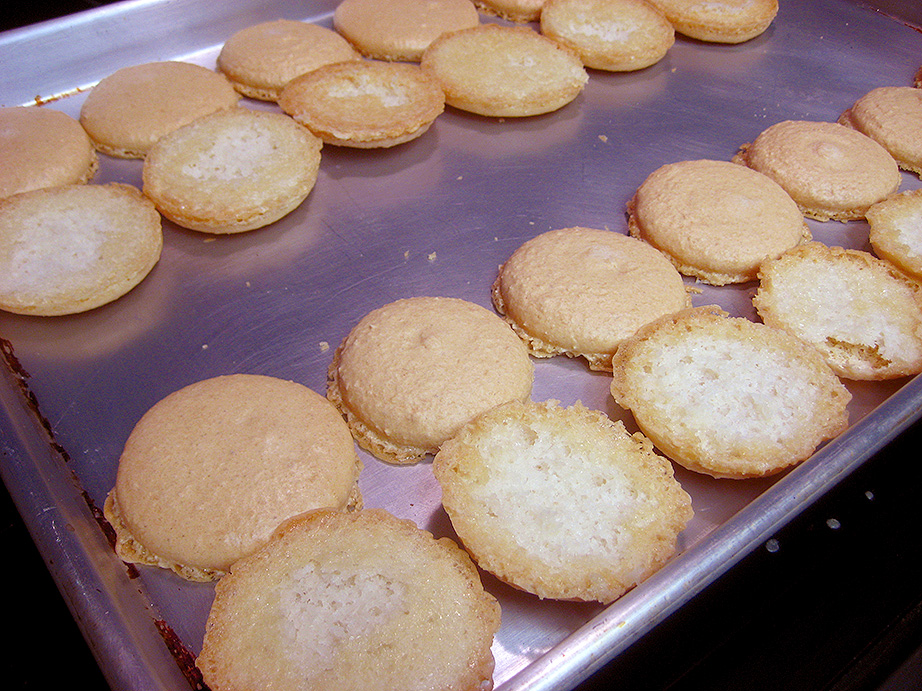
Mine didn’t fare so well. They stuck to the parchment and I had to scrape them off and they were a little more chewy than usual, but they still tasted great. They had a good toasty coconut flavor, probably brought out by them being in the oven so long.
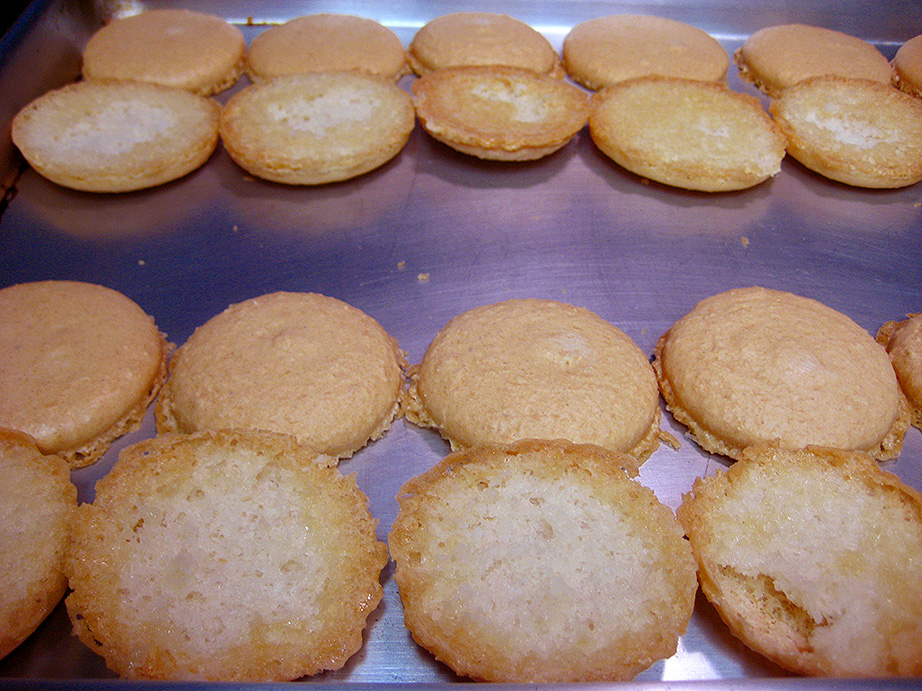
Once the macs are cool, peel them off the parchment and lay them in rows with every other row lying upside down.
Grab your bowl of chilled pineapple curd and scrape it into a piping bag and pipe dollops onto each flat side of the upside down cookies, or just use a tablespoon to drop spoonfuls onto the cookies. Top them with their mate cookie and flatten until the curd just starts to come out the sides.
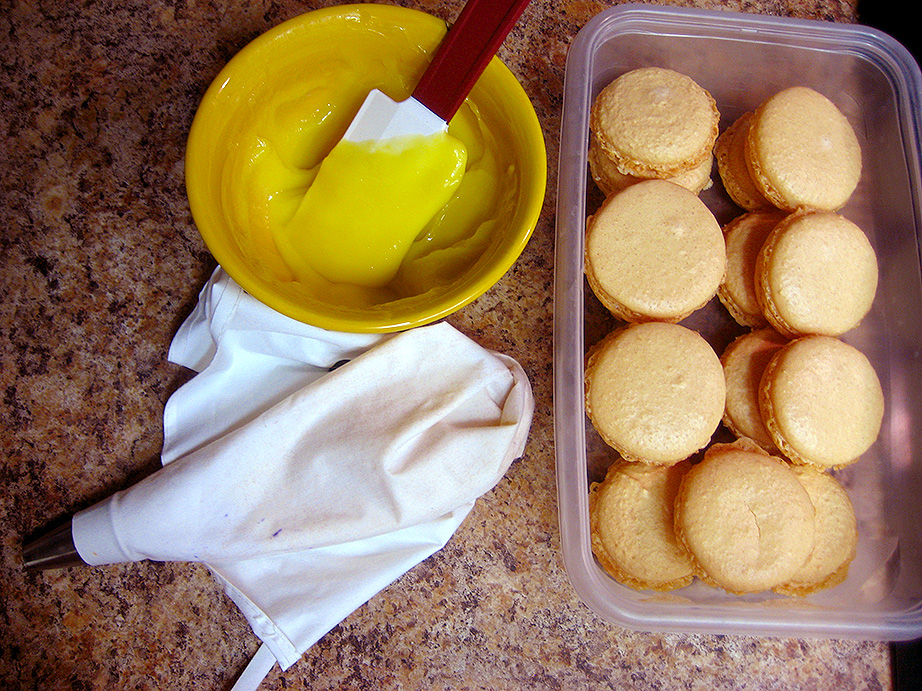


You may think that now is the time to eat these little gems, but sadly they’re best after a day or two in the refrigerator. Store them in an airtight container for a minimum of 24 hours, and you’ll be rewarded by some soft, chewy, tropical-tasting cookies.
Any extras that you don’t eat can be stored in an airtight container in the fridge. Because the pineapple curd has so much moisture, the cookies can sorta deteriorate after more than 5 days or so, so eat them quick! I had a hard time not snagging one every time I went into the kitchen. They’re pretty damn good.