

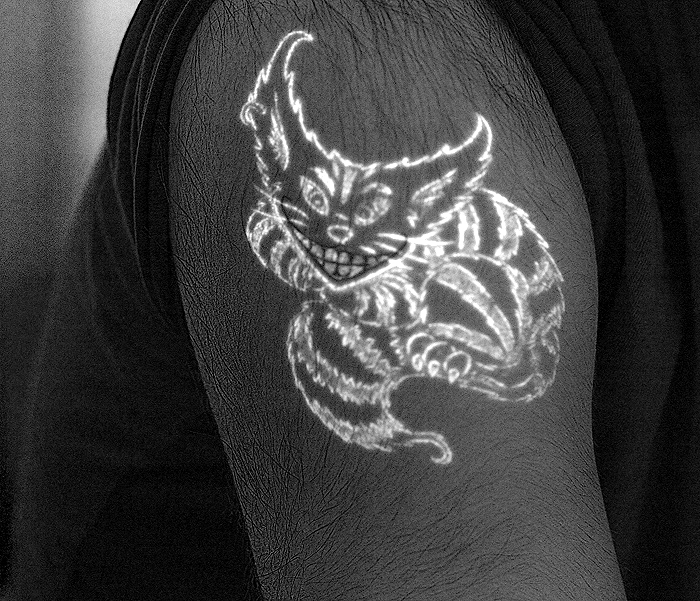
My roommate’s birthday was last weekend. Ben’s always been a fan of Alice in Wonderland and especially took to American McGee’s video game adaptation from 2000. He even has a tattoo of that version of the Cheshire Cat, which is pretty sweet cause it’s mostly in blacklight-reactive ink except for the Cat’s grin. So, unless there’s a blacklight nearby to illuminate the body of the cat, all you see is the black outline of his creepy smile!
I wanted to make Ben a cake for his birthday, and thought that McGee’s version of the Cheshire Cat would be a perfect subject. However, I had never previously made a fondant-covered cake. Talking to a friend of mine regarding how I should go about creating the cake, she suggested that I make my own fondant because it tastes much better than the fondants available commercially. So, make my own fondant, I did!


I had a bit of a forgetful moment and didn’t add any vanilla extract or other flavoring to my fondant, so it’s primary flavor was sugar. Don’t be like me! If you make your own fondant, don’t forget to add some sort of flavoring, unless you’re particularly fond of the flavor of OMG SO MUCH POWDERED SUGAR. I’d recommend using clear vanilla extract if you’re making pure white fondant, so the brown tinge of typical vanilla won’t color your fondant. Aside from forgetting any flavoring, the fondant-making was a breeze! I just melted one 10-oz bag of mini marshmallows with 5 tablespoons of water in a large bowl, going in 30 second intervals and stirring in between until it was all melted. Once things were all smooth, I stirred in some black food coloring gel. I’m partial to the gel food colors because they require much less than liquid food colors to achieve the same shade, and less liquid in your recipe means it won’t potentially screw something up.
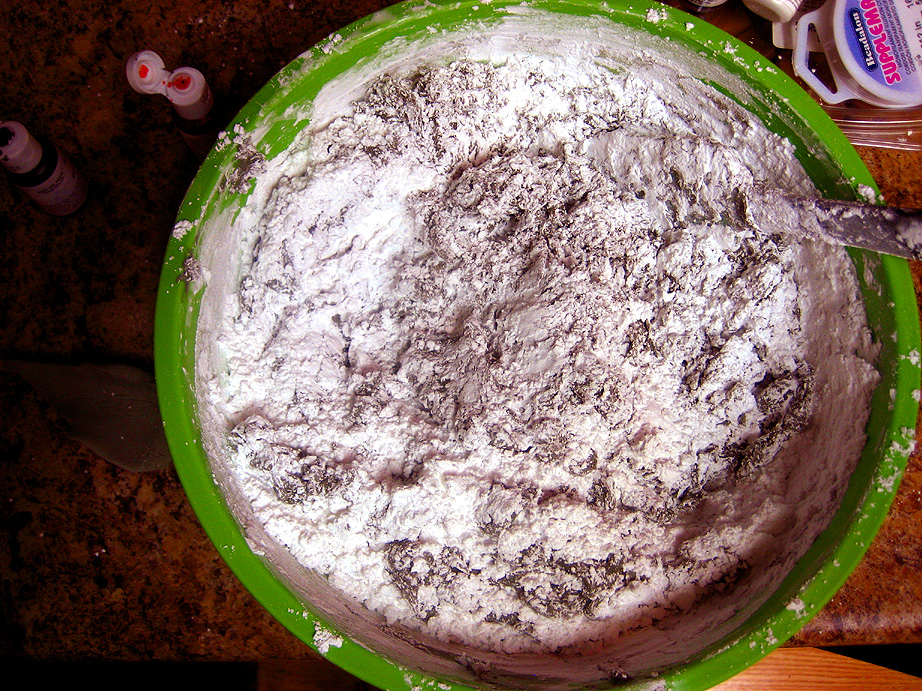
Once the marshmallow was tinted, I stirred in a 2 lb bag of powdered sugar. This was a little difficult, but once the sugar was mostly incorporated, I decided to knead in the rest by hand. Before even attempting this project, I solicited advice from my cake decorator extraordinaire friend, as well as watched many YouTube videos and other websites on working with fondant. Lots of the sites suggested using vegetable shortening to prevent the fondant from sticking to your rolling surface. One video I watched, spoke to me. The decorator in the video had the brilliant idea of using cooking spray! I always have this on hand, and felt it would be a little simpler and less messy than digging my hands into a vat of shortening and smearing it all over my counter top.
I forgot to mention the most important part of this whole thing — the cake!! I decided to be a lazy-ass and use a box of chocolate cake mix. While I have a terrific, moist and flavorful chocolate cake recipe in my arsenal, I felt that I wanted to focus on the fondant and decorating above all else. Don’t tell me that you don’t also enjoy boxed chocolate cake mix, no matter how health-conscious/all-natural you happen to be. There’s a reason why so many people purchase it (and also a reason why it only costs around $1.50, but we won’t get into that now…).
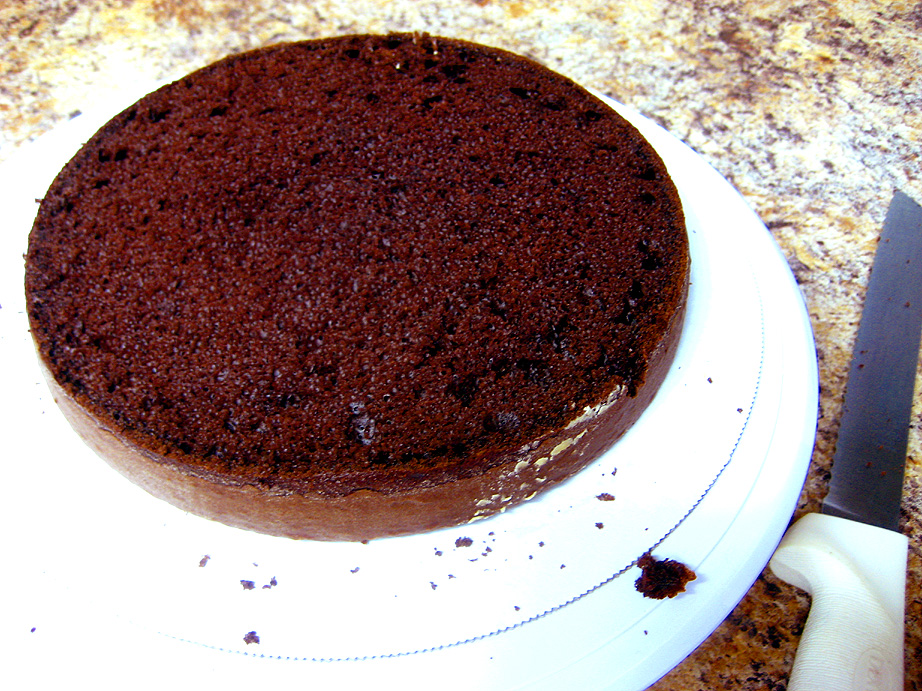
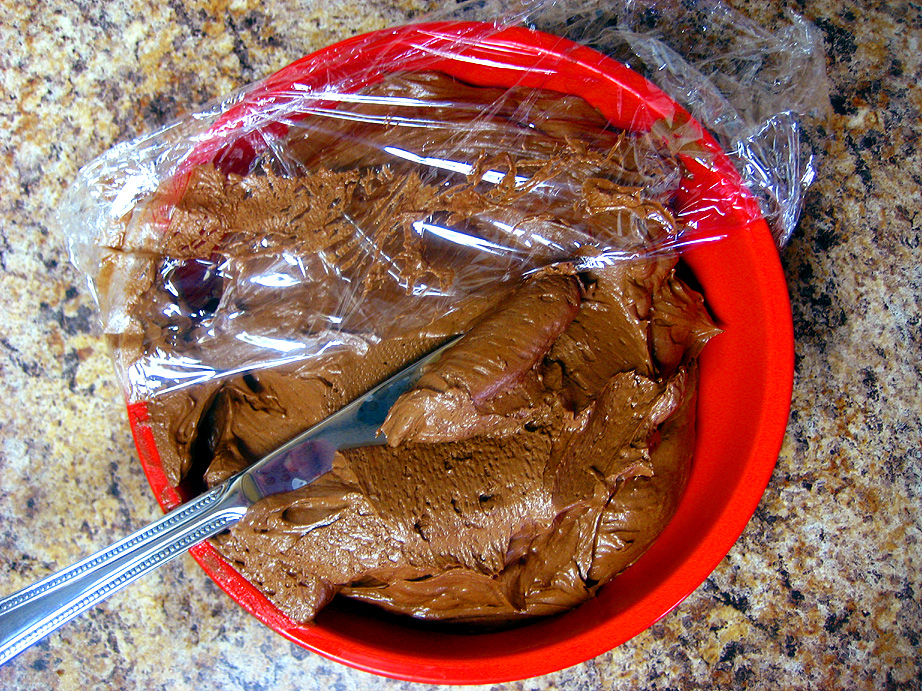
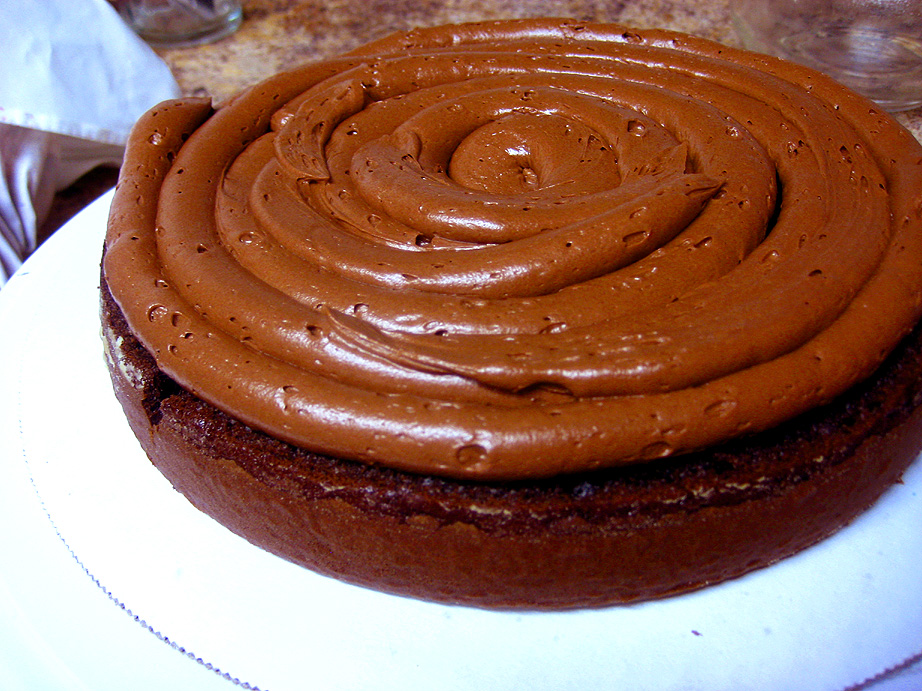
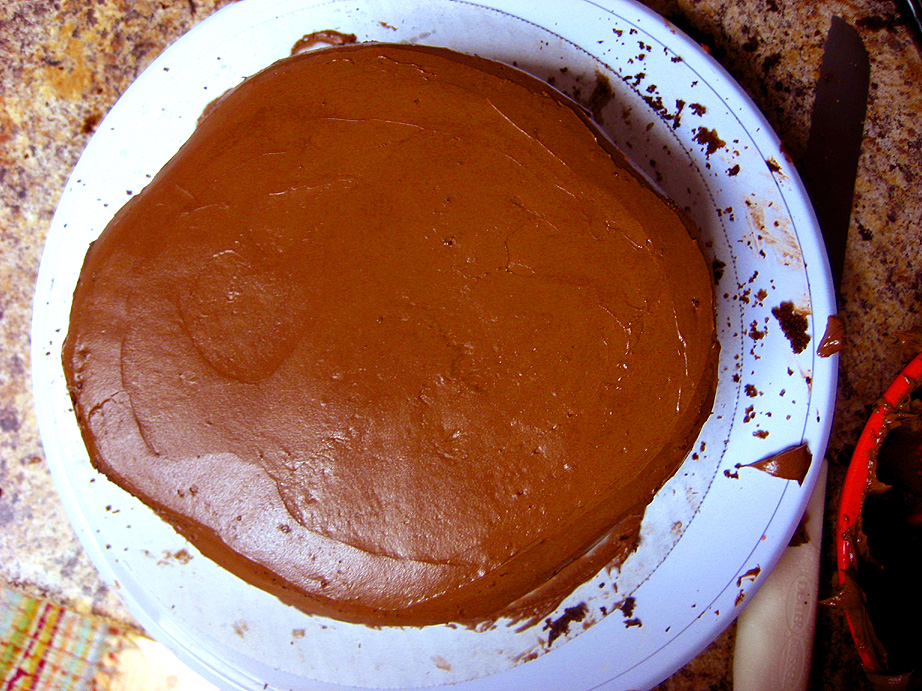
Even though I used boxed cake mix, I can’t abide frosting from a can. I made my own chocolate frosting, a basic American buttercream and it makes a world of difference over canned frosting. After I baked the cake (two 8 inch layers), I let it cool, sliced off the tops to level them and filled the layers with the chocolate frosting.

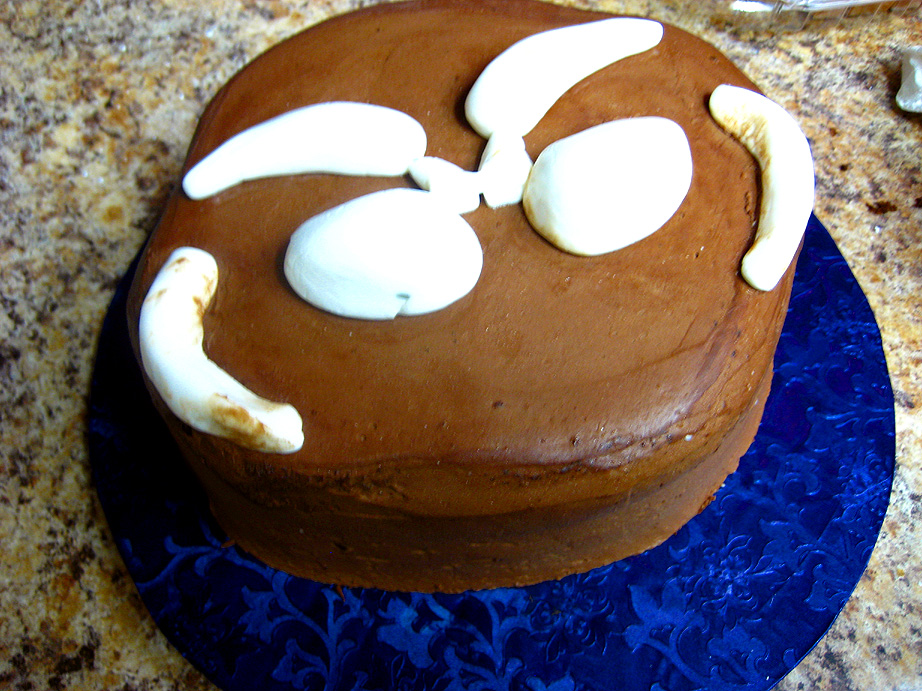
Since I was going to end up with a Cheshire Cat-shaped cake, I carved out the basic shape of the face before I put on the crumb coat of frosting. Here’s the original photo I was working from for the cake’s design:

Creepy, huh? I was just eyeballing the basic outline of the face and I felt that I could have gotten it a little more sharply defined where the cheeks are concerned, but no matter.

This was a cat-shaped cake, and thus it needed ears. I decided to go the gumpaste route (something that was also new to me) and shape them by hand. I made the ears the week before I put together the finished cake so that they would have ample time to dry. I tinted the gumpaste the same way that I did the fondant, but I kneaded in the color. Once they were fully dry, I used pink food color in a spray can to get the proper pink color on the insides.
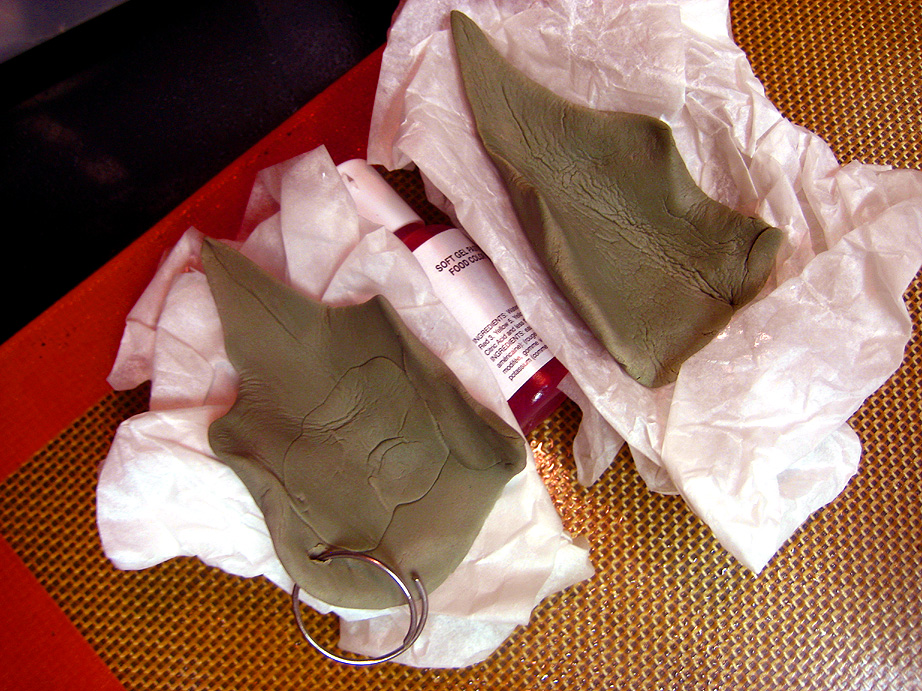
I had read about nightmarish situations in which people’s gumpaste creations were ruined because of cracking, so to prevent the gumpaste from drying too rapidly and causing cracks, I took the advice of some people on cake decorating forums and used a 50/50 mix of gumpaste and storebought fondant. It worked like a charm, no cracking!
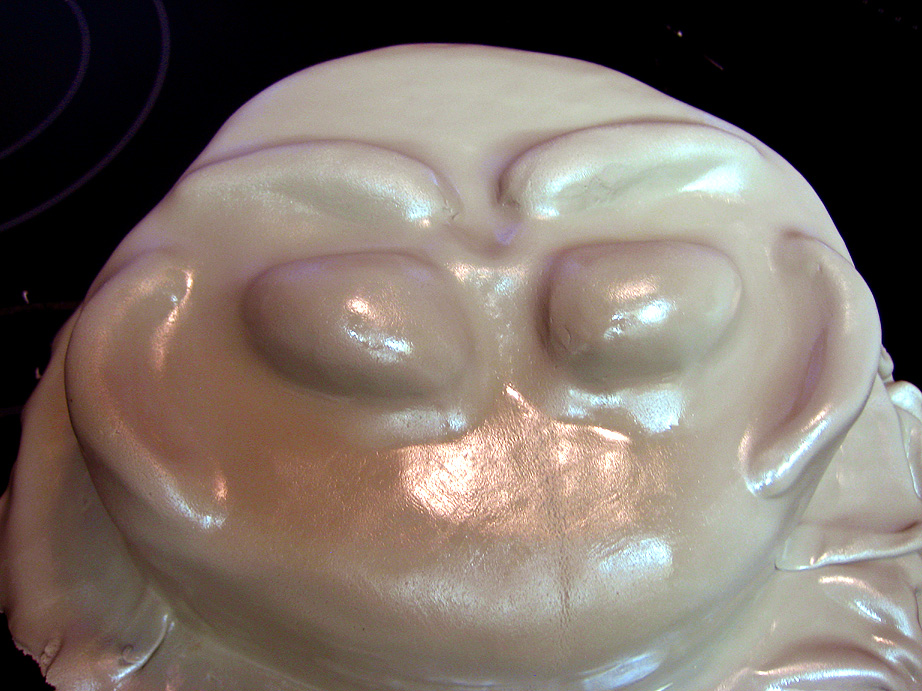
Once the cake was fully frosted and the fondant was all rolled out, I began the task of covering the cake and finishing the cat-like decorating. I had to bulk up the face somewhat, to create the cat’s puffed cheeks and furrowed brows. To do that, I just shaped some storebought fondant and placed the pieces on the cake before I covered the cake in fondant.

Before I began with the fondant, I thought I would just use my counter top as a rolling surface. I didn’t want to get my counter full of cooking spray, so in a pinch I used my (clean) flat electric stovetop. It worked brilliantly and cleaned up in a snap! I’m totally using this in the future if I ever make another fondant-covered cake.
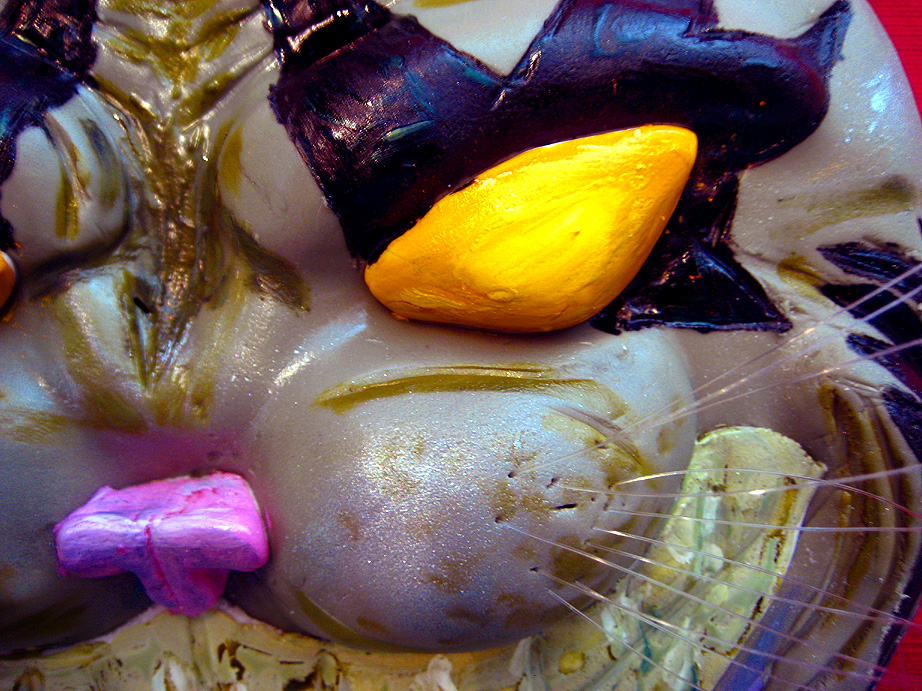
With the whole cake covered in fondant, my next step was to start placing more fondant pieces on the cake to create the face. I shaped small pieces of fondant into eyeballs, a small piece for the nose, and a flat piece which I scored into the cat’s teeth. I also applied a thin snake of fondant for the cat’s bottom lip.
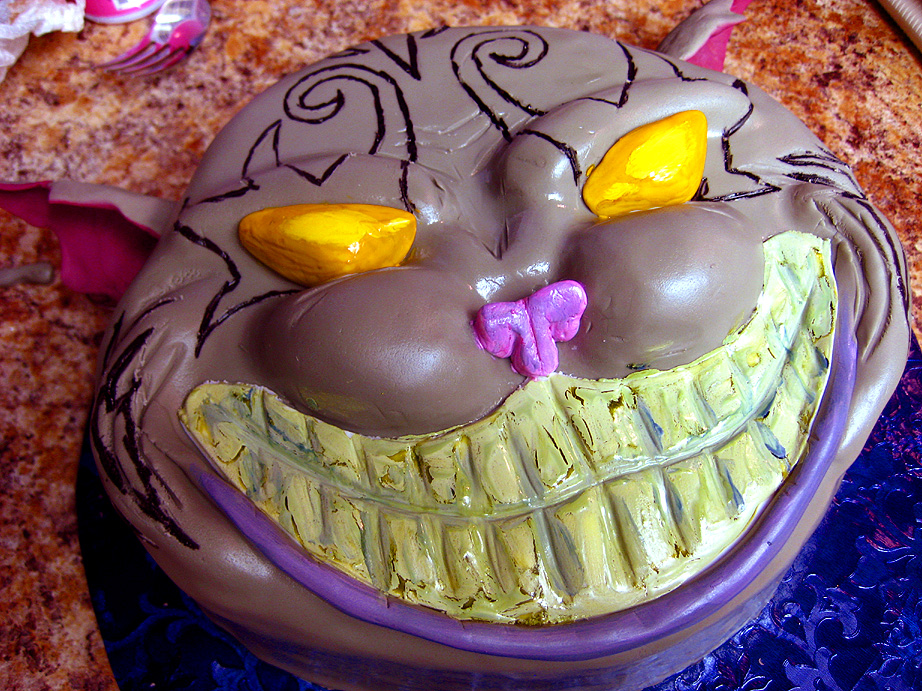

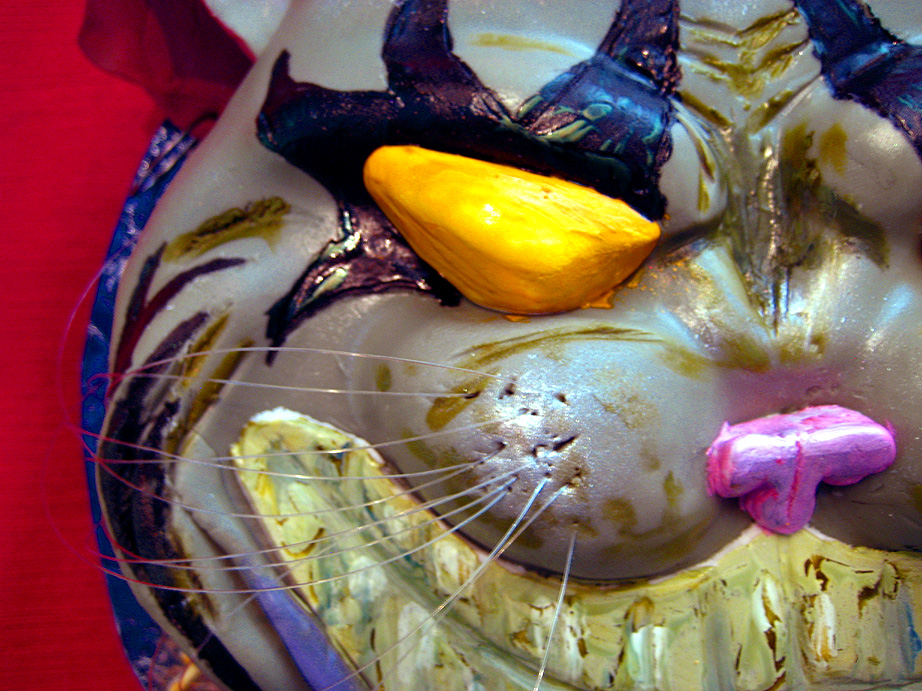
All the colors are gel-based food coloring, undiluted and painted on just like you would regular paint. I used a wet-on-wet technique so I could easily blend all the colors. The teeth were made from a white sheet of fondant draped and cut out on top of the face. I layered a mixture of gold, black, white and light yellow to achieve the colors on the teeth. It ended up looking really awesome because some of the colors started to separate out and look almost creepy and disgusting.. I think this cat is in need of a good teeth-brushing. The nose was colored with a bit of rose-colored gel, as well as white and a touch of black gel.
The eyes were colored using the same gold, white, and light yellow colors, as well as a touch of gold luster dust brushed on after the fact for more of a light-catching effect. The black tribal-like tattoo designs on the face were outlined freehand with a paring knife and then outlined in with a black edible food coloring pen. This thing was a godsend cause I doubt I could have made such precision lines just using a small brush! Once I had the outlines done, I brushed on straight black gel food coloring. The ears were just shoved into the sides of the cake since the fondant was still soft, and it held them quite well with no sagging.
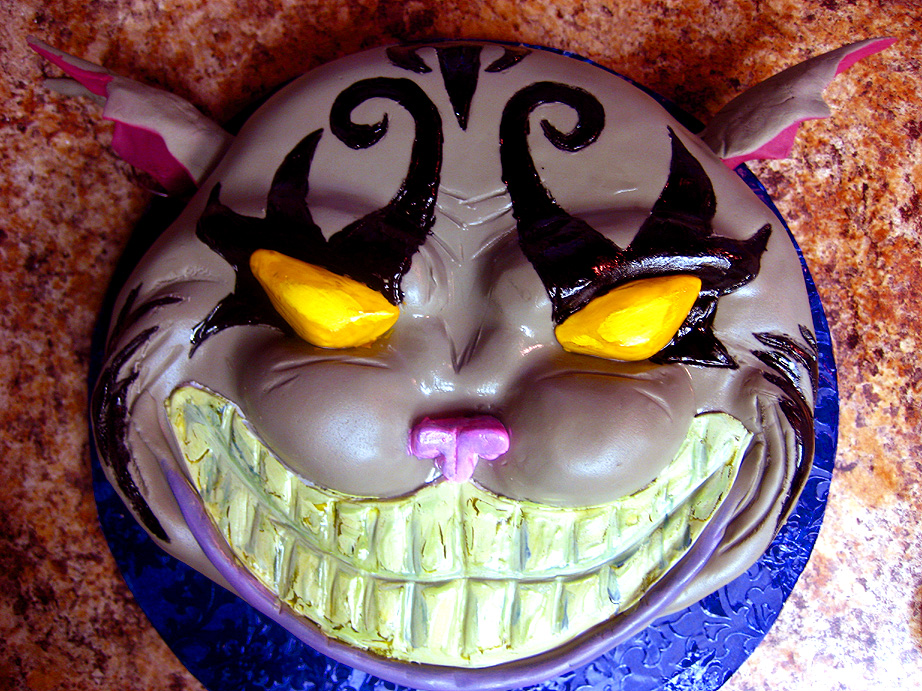
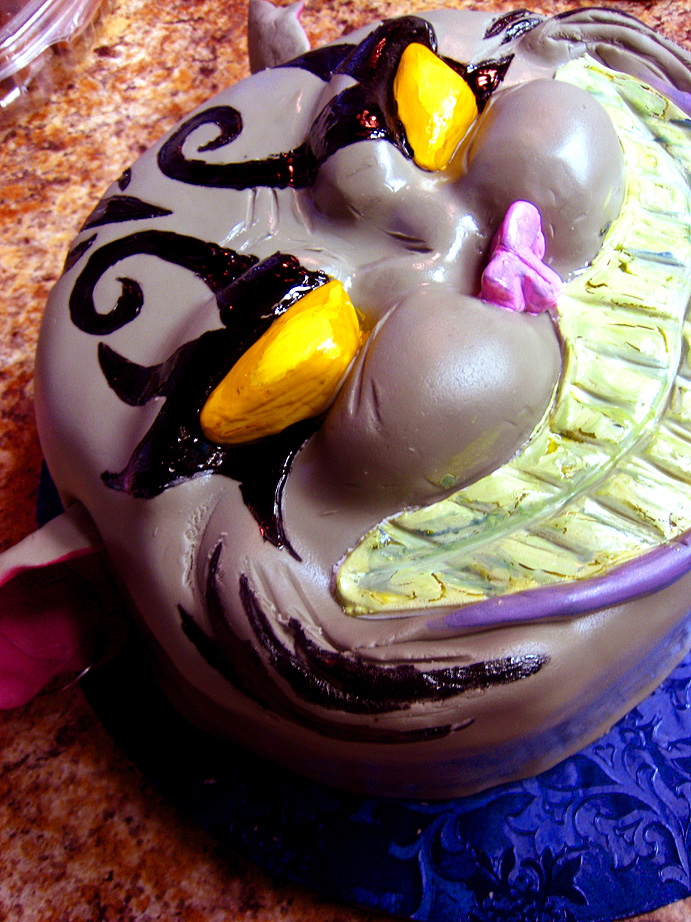
Once I had all the color down on the face, I added some shadow effects using some of the yellow and black food colors, and then brushed on a bit of silver luster dust for a good metallic sheen.
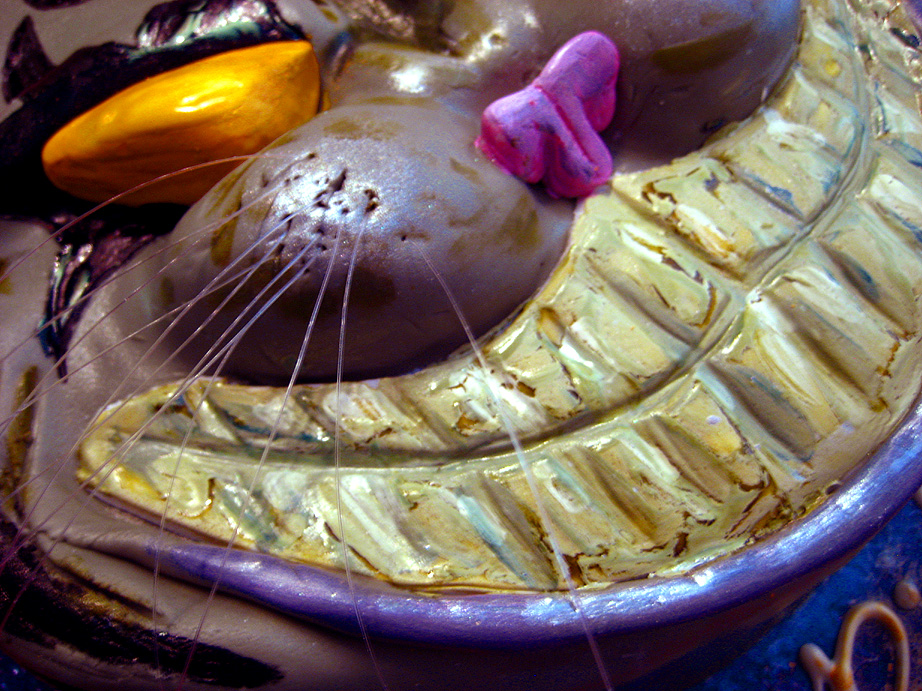
From the get-go, I knew I wanted to use fishing line for the cat’s whiskers. It worked splendidly! I cut small identical lengths of fishing line and shoved them into the cat’s cheeks and voila! Whiskers. I thought they looked pretty realistic.
The finishing touch on the cake was to write “Happy Birthday!”. I used melted white candy melts for the writing, and attempted to brush on some gold luster dust once the writing had set up, but it ended up making a bit of a mess out of the cake drum. It didn’t brush off very well, so I had to be satisfied with a blue AND gold cake drum. Oh well!
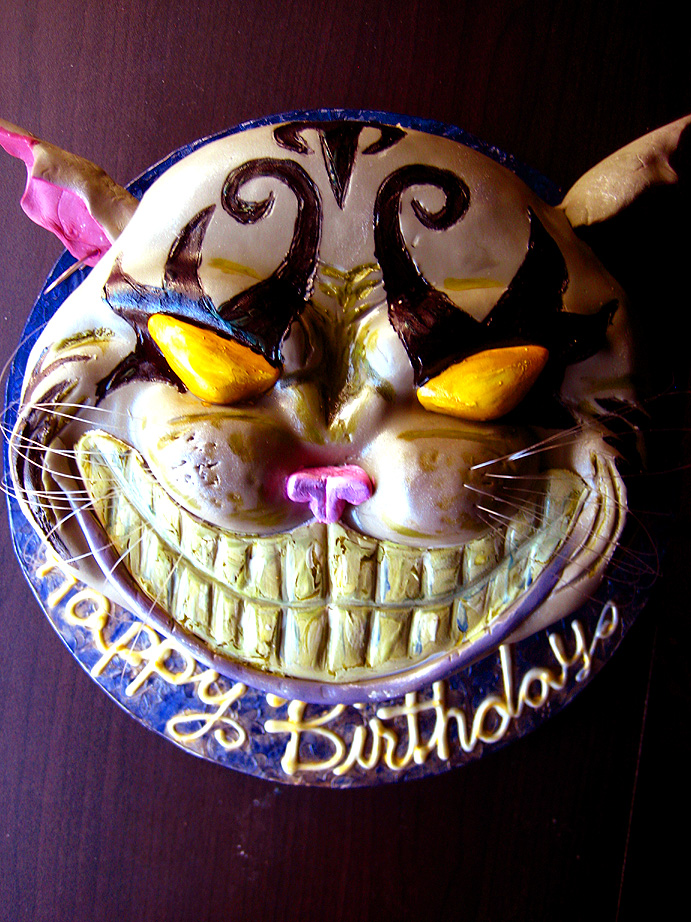
Check out the finished cake!

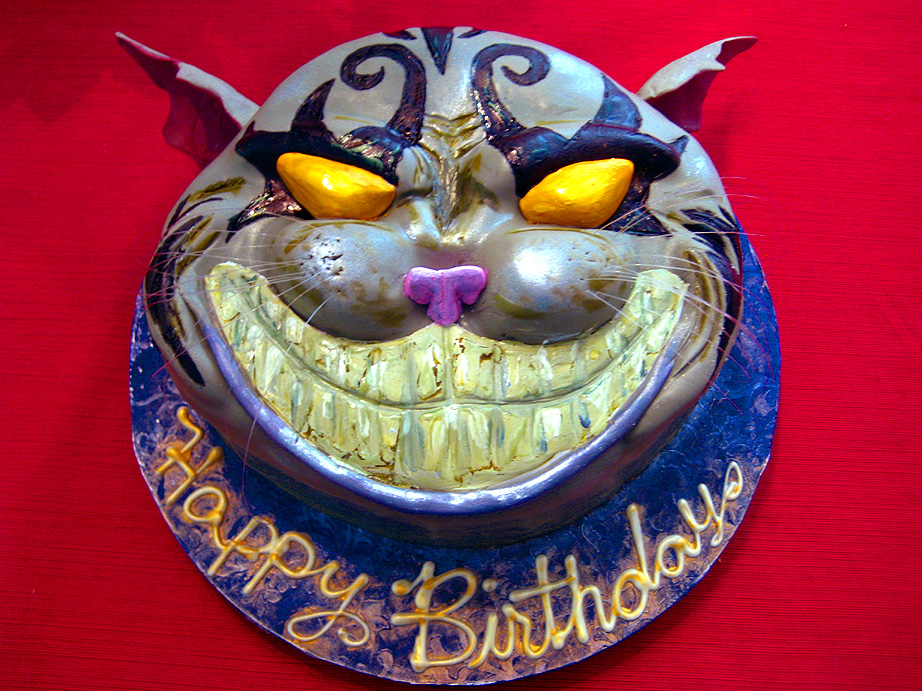
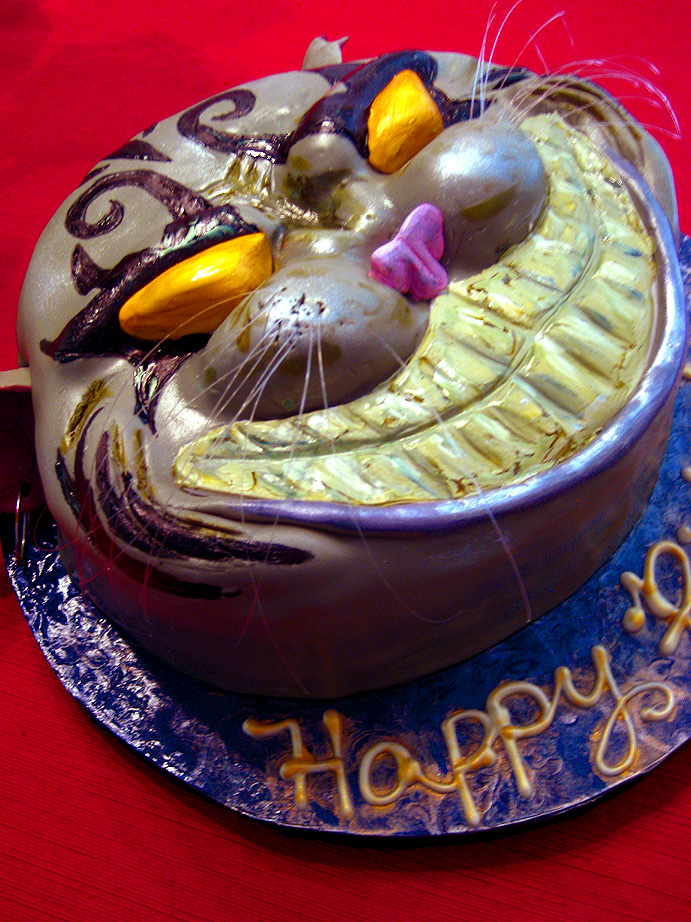
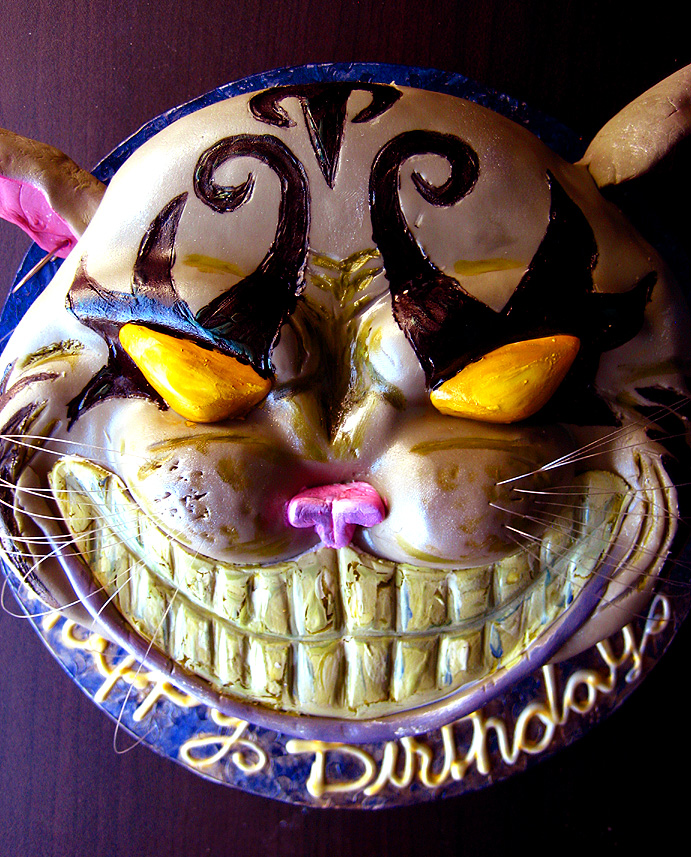

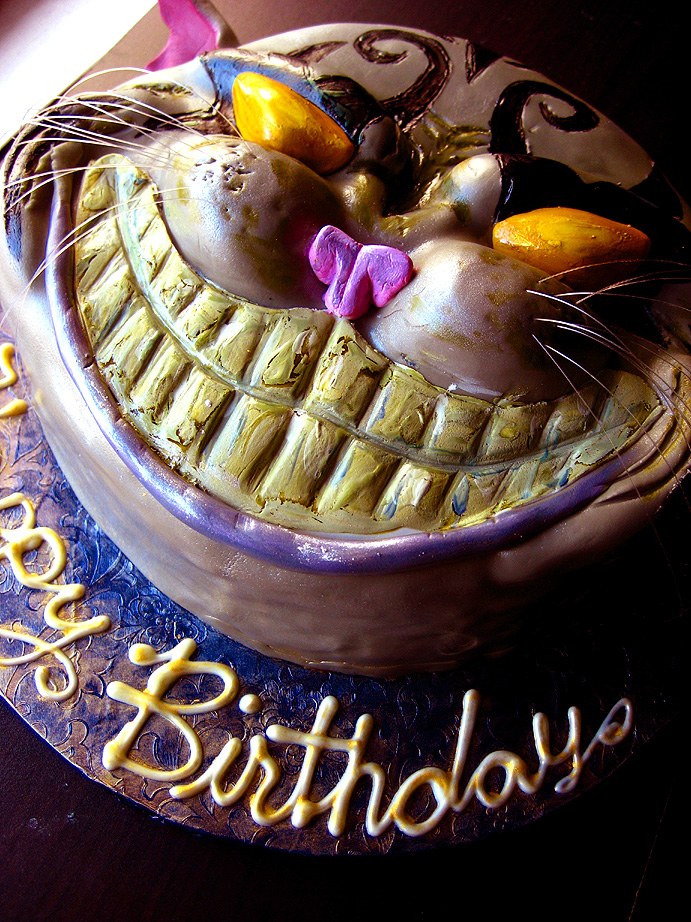
I’m still a little amazed at how well this cake turned out, for being my first foray into the world of fondant. All total, I think the entire thing took around 8 hours to complete, including cake baking, frosting, fondant-ing and decorating. The best part was, the birthday boy was totally jazzed to receive this cake and that’s the most important thing to me. Happy birthday, Ben! Glad you enjoyed your cake!
