

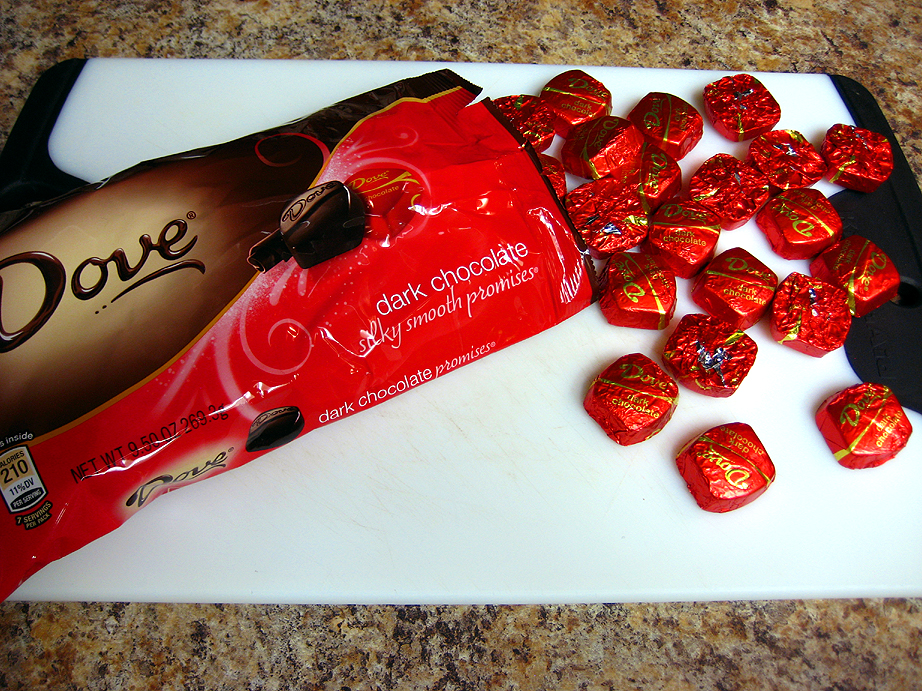
Seeking out a Valentine’s Day gift for a significant other is sometimes difficult. Aside from agonizing over just what to get your sweetie, there’s the added stress of worrying if they’ll truly love the gift you’ve gotten for them. So far, I have yet to meet a man or a woman who would turn down the gift of chocolate. Want to do them one better? Make them these homemade chocolate-covered strawberries! Sweet, creamy, chocolate-y, and while some may say that they’re predictable this time of year, they’re a great traditional Valentine’s gift. Save yourself tons of money by making them yourself. Most places that sell individual chocolate-dipped strawberries at this time of year, tend to charge per berry what you’d usually pay for several pints of strawberries. The best part about making them yourself? You can choose your most favorite brand of chocolate to dip them in.
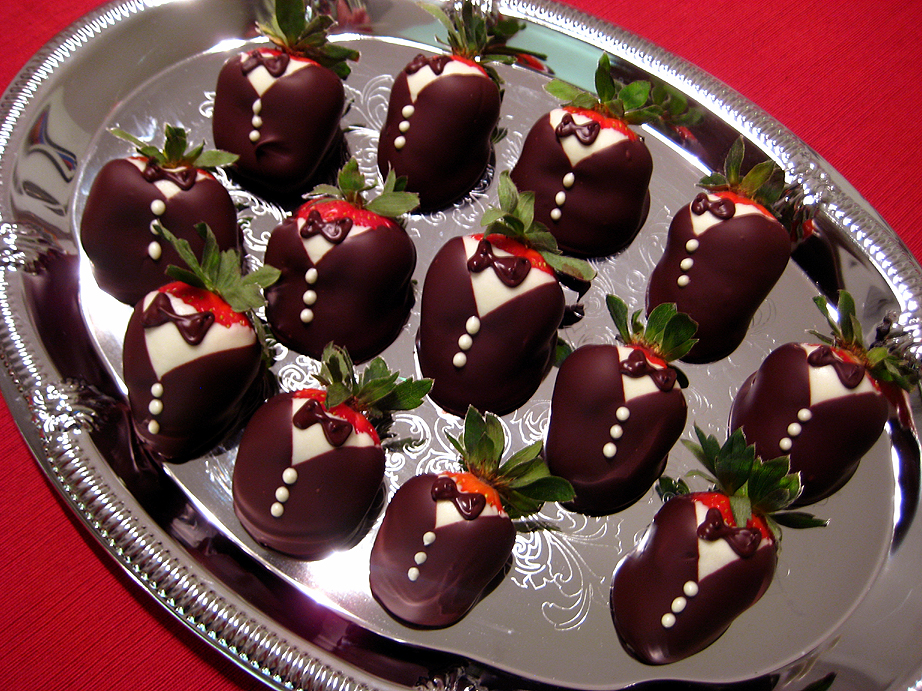
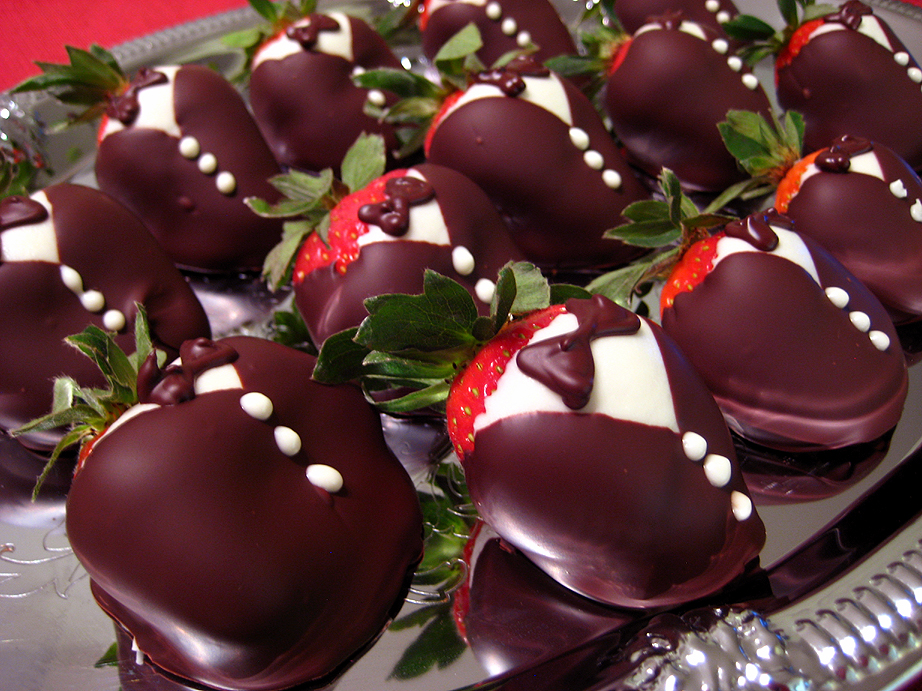
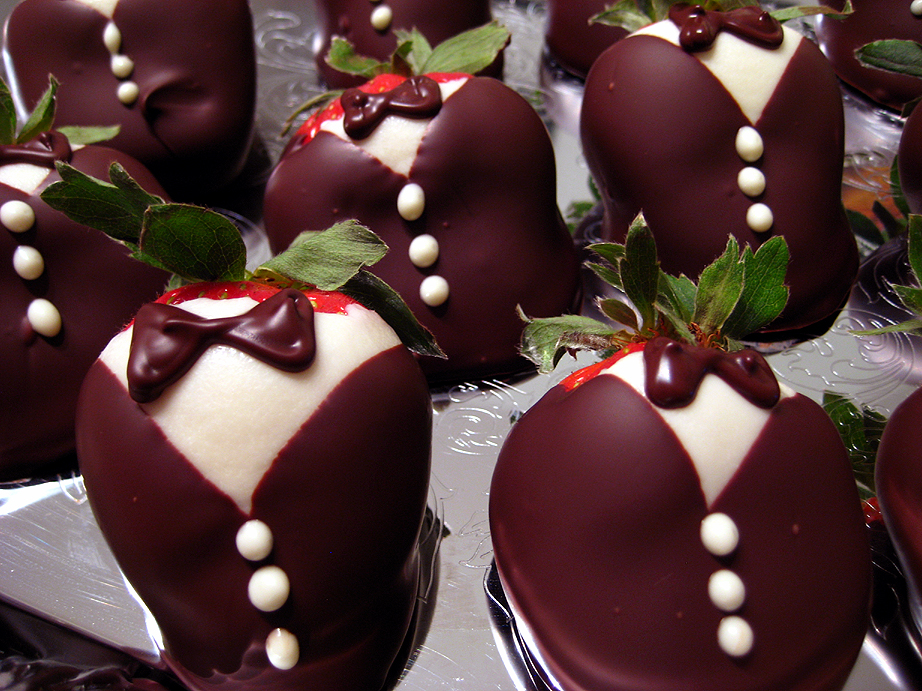
Since these are a gift for my boyfriend, I figured I’d make these berries a little more masculine and dress them up in tuxedos! People seem to go nuts for these dapper gentlemen berries, and with good reason. They look much more complicated than they really are, and you can save a fortune versus buying them at some sweet shop. You can use that extra money you saved to put toward a nice, romantic dinner for you and your honey. These berries will make an irresistible dessert.
tuxedo strawberries
10 oz good quality dark or milk chocolate (not chips!)
11 oz white chocolate (chips are okay here)
5 1/2 tsp vegetable oil (if you’re using white chocolate chips. Omit if you’re using good white chocolate in bar or block form)
20 strawberries (about one pound)
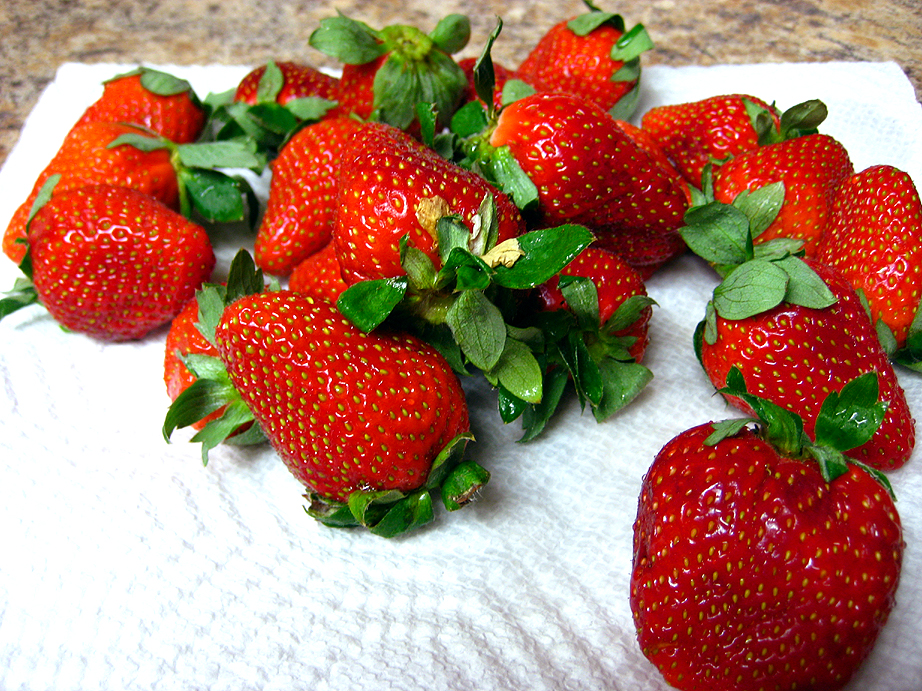
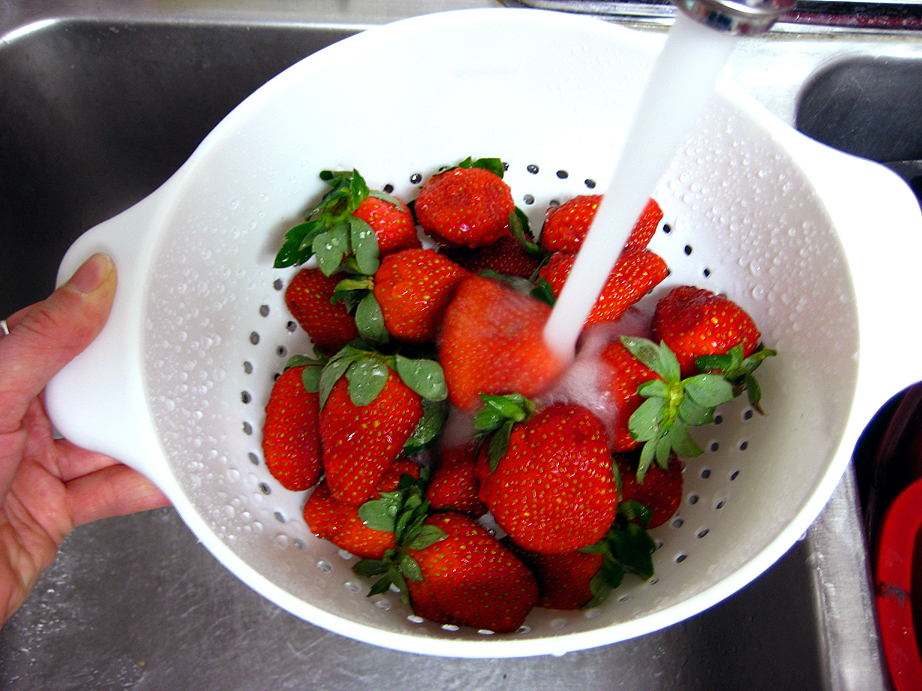
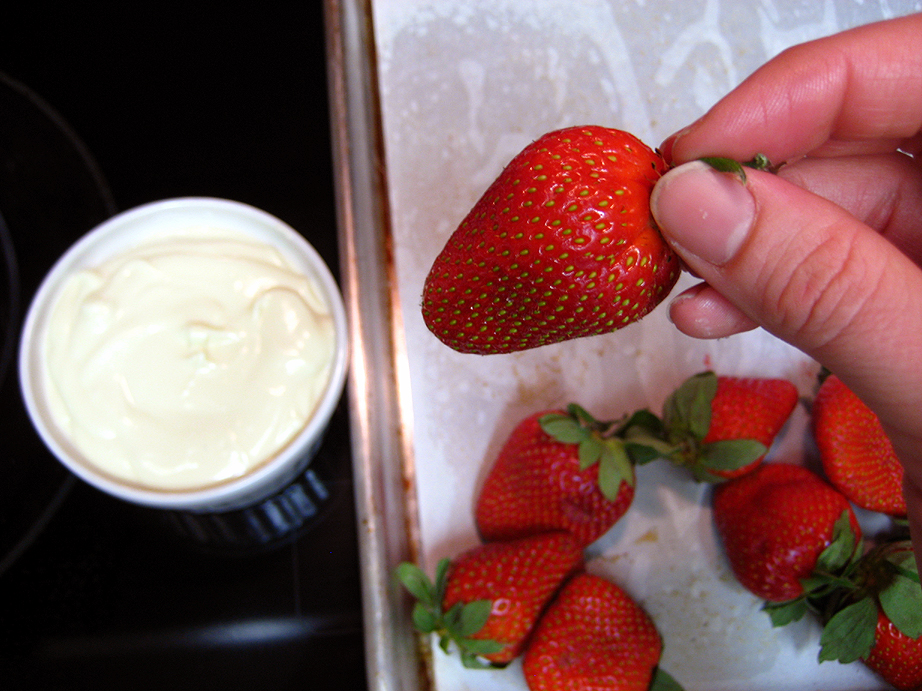
Start by rinsing the berries. Put them into a colander and run water on them, gently tossing them to make sure that they’re all clean. Dump out onto a few paper towels and blot dry with another paper towel, being sure to get all the water off, especially around the leaves. Lay them out on a parchment-lined sheet pan and set aside.
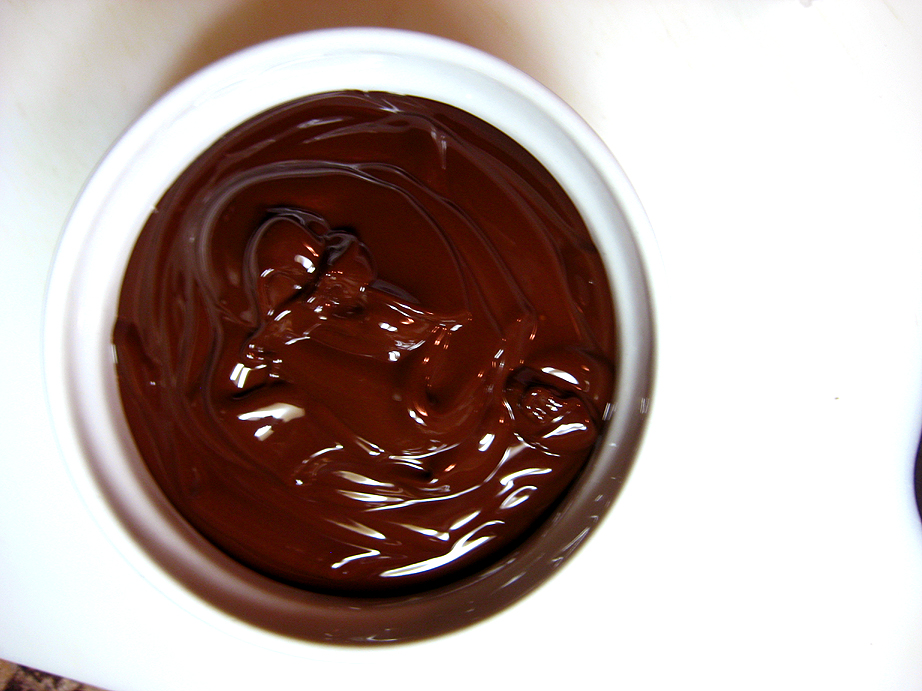
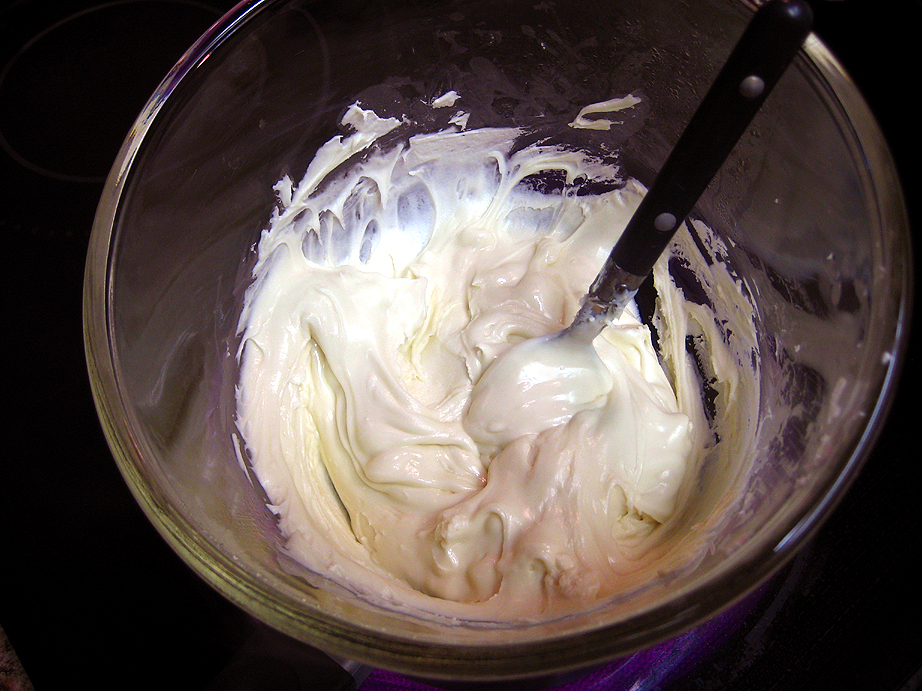
Melt the dark chocolate in a bowl over a pot of simmering water, taking care not to let any steam from the water get into the chocolate. Nobody likes seized up chocolate! Stir the chocolate periodically while it melts, so that it melts evenly. Once the chocolate is melted and smooth, pour it into a small bowl or container that is deeper than the strawberries are tall. Set it aside to cool slightly, and melt the white chocolate the same way as you melted the dark chocolate. If you’re using white chocolate chips, the additives in them which allow them to keep their shape when exposed to heat, will also not allow them to melt down as well as white chocolate in bar form. So, once the white chocolate is melted as much as it’s going to be, stir in 5 1/2 teaspoons of vegetable oil to make the chocolate smoother and more fluid. Pour the white chocolate into a container that is the same size as the dark chocolate’s container. I used little ramekins but small, deep bowls, or even a juice glass, will work just fine.
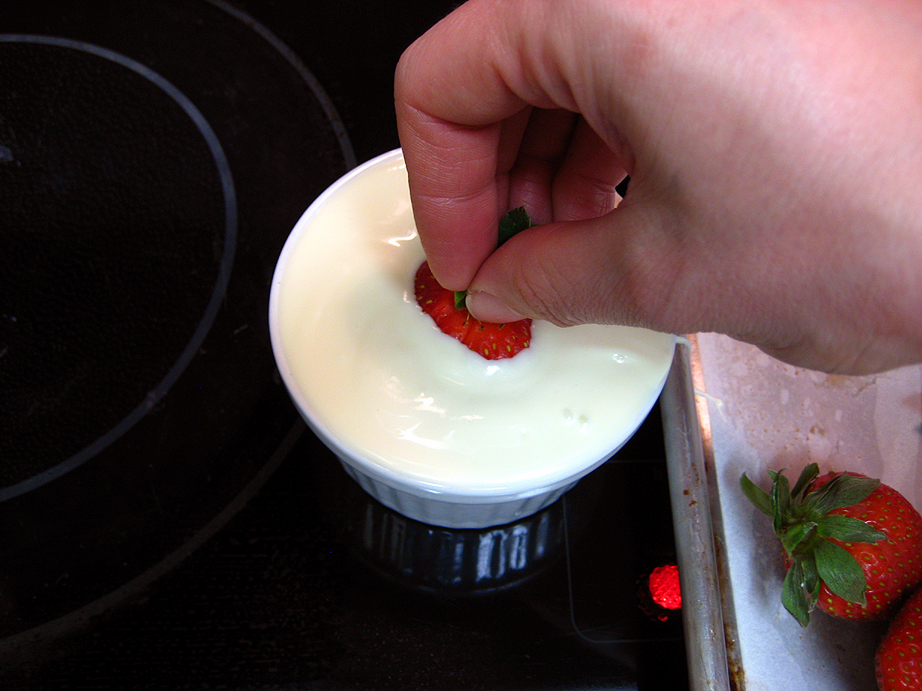
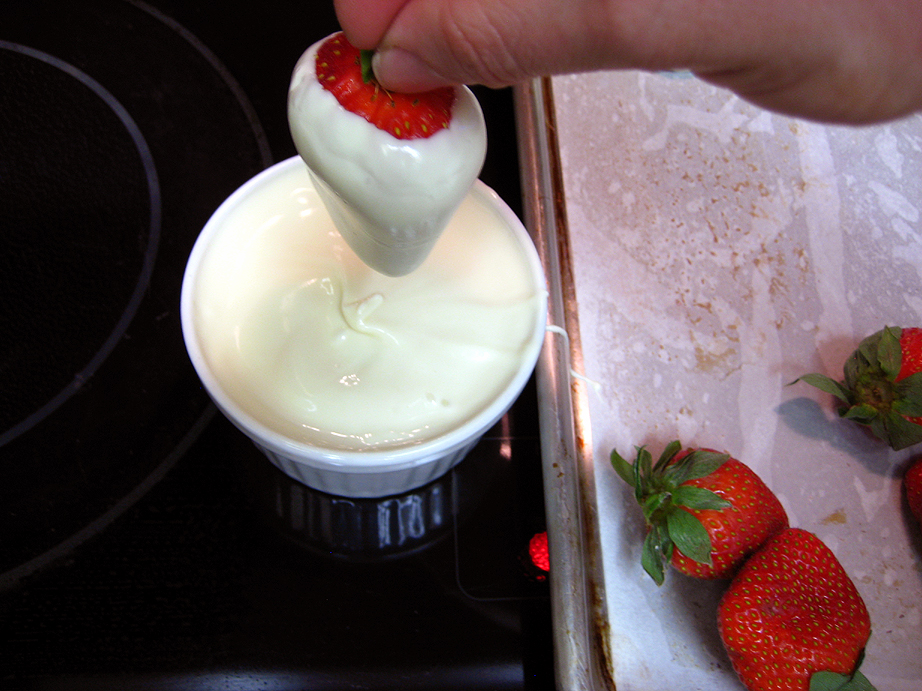
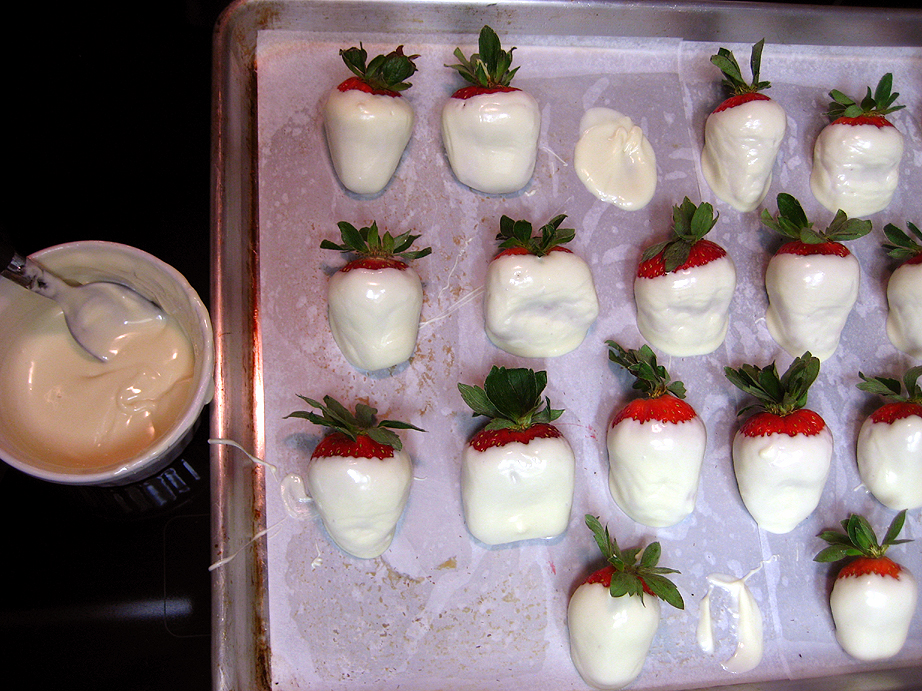
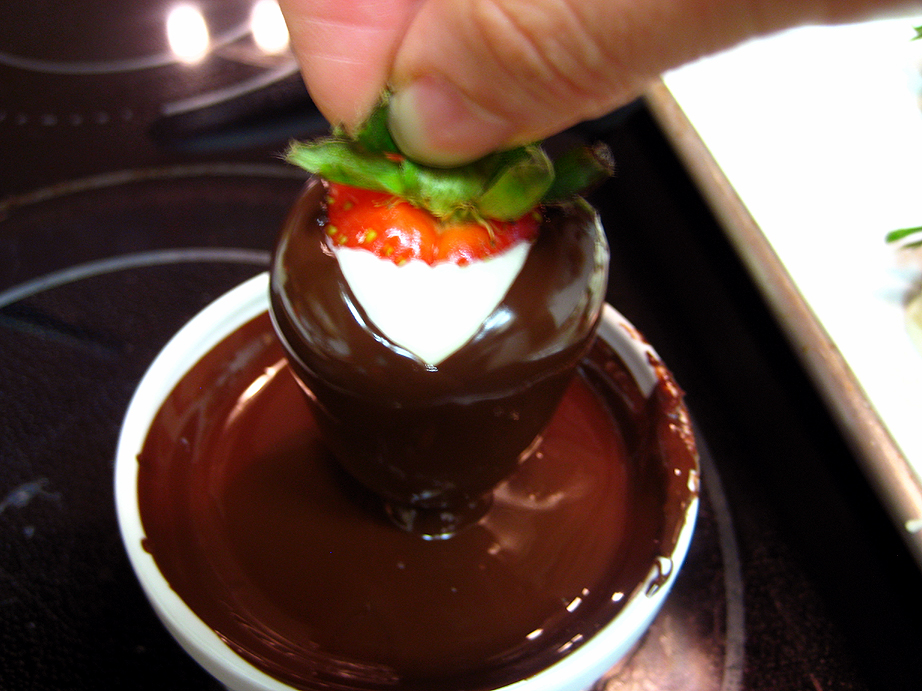
To create the shirt on the strawberries, grasp each berry by the stem and leaves, taking care to gather up all the leaves between your fingers so that they don’t drag in the chocolate and make a big mess. Dip each berry straight down into the white chocolate, leaving some of the top of the berry exposed. Pull the berry out of the white chocolate and drag the back side of it across the edge of your bowl/container of chocolate, to help fight puddles of chocolate from forming around the berry. Place the dipped strawberry down on the parchment-lined pan so that the side that you just scraped off is resting on the pan. Give the berry a little push forward once it’s sitting on the parchment, to prevent any chocolate from building up under the tip of the berry. Continue to dip all the strawberries this way. Once they’re all dressed in their white shirts, place the pan of berries into the fridge for about 15 minutes so they chocolate can set up.
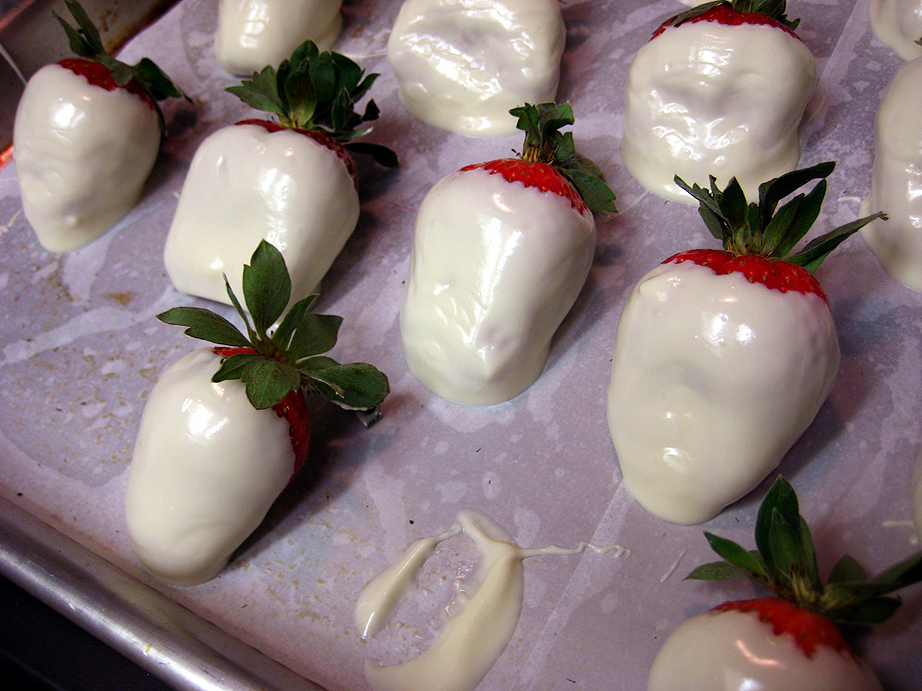
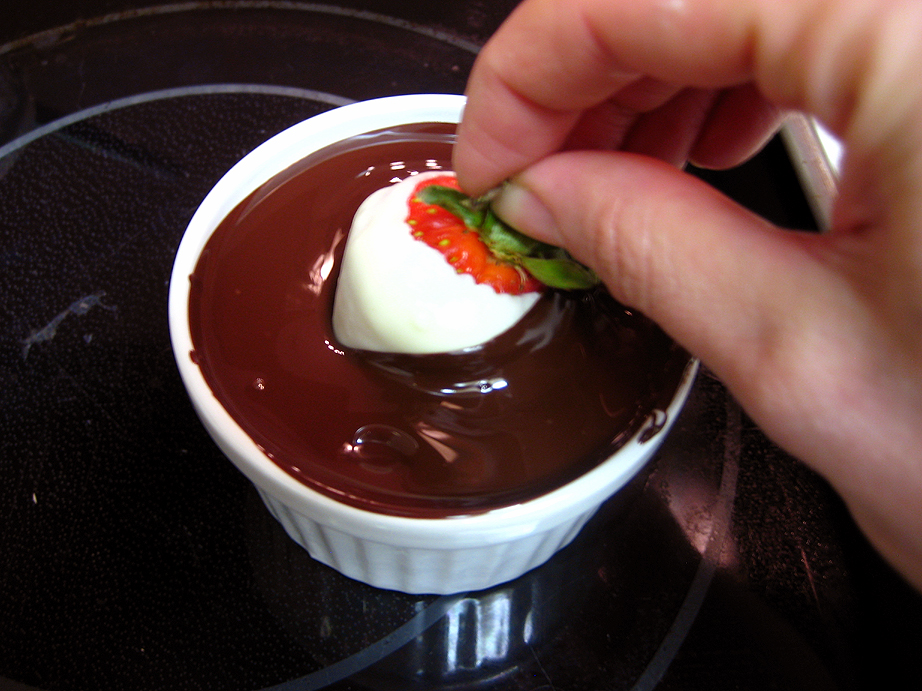
Now, test the temperature of the melted dark chocolate. It should still be quite fluid, but it should not be any warmer than body temperature so that it won’t melt the white chocolate when the berries are dipped into it. Once the pan of strawberries is chilled and the white chocolate is set, take out the pan and let’s put some jackets on these berries!
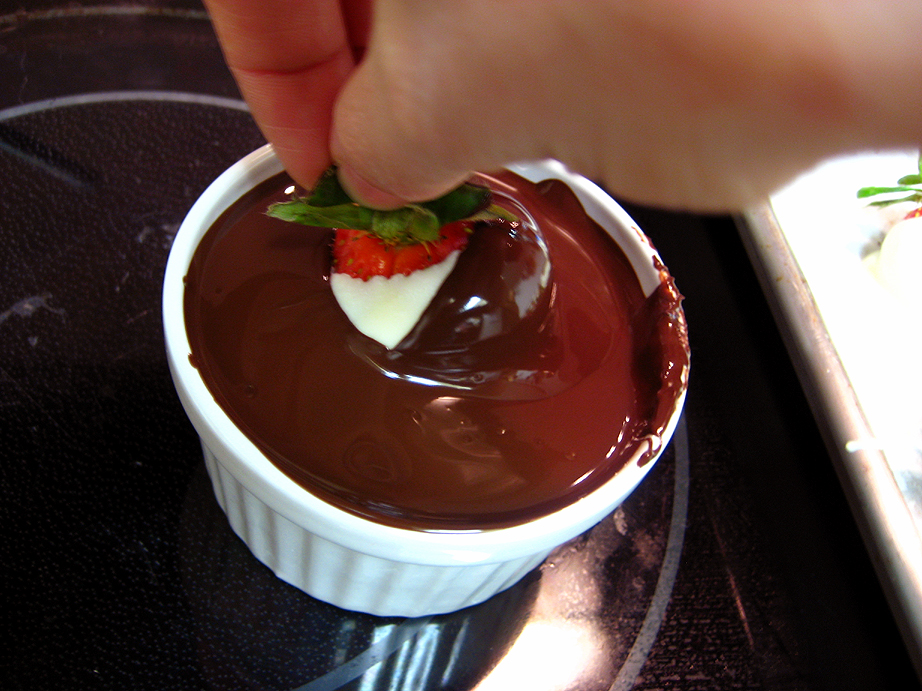
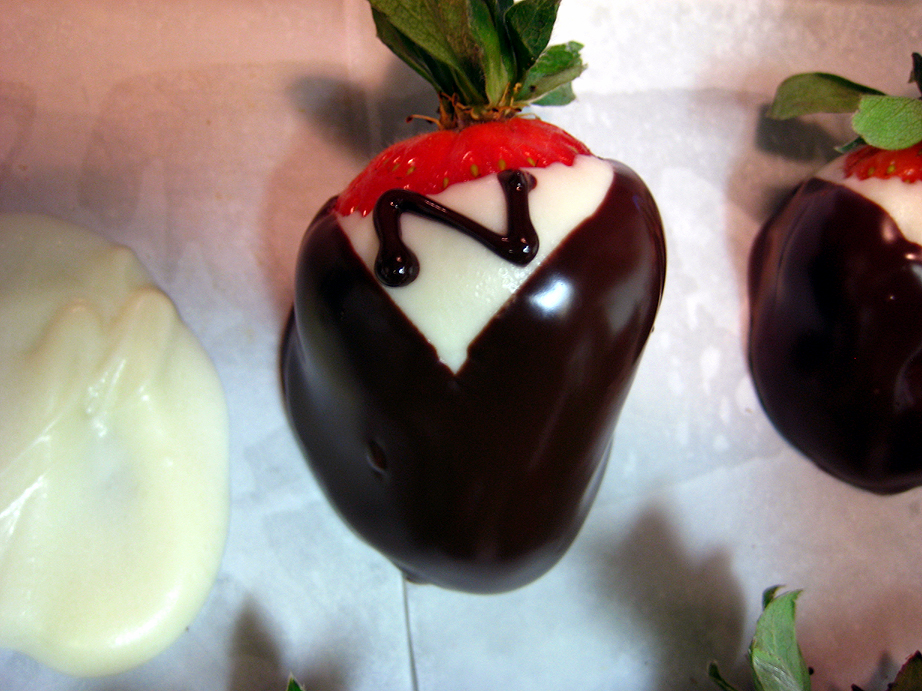
To form the jackets on the strawberries, hold the strawberry firmly by the top as before, and dip it into the dark chocolate at a slight angle. Come all the way up level with the white chocolate layer on the “shoulder” of the berry, and then repeat on the other side so you’ve got just a triangle-shaped area of white chocolate showing in the front. Once again, drag the berry gently across the edge of the chocolate container to get rid of any excess chocolate. Set the strawberry on the pan, remembering to nudge the berries forward once they’re on the parchment. Place the berries back into the fridge for 5-10 minutes so that the dark chocolate layer has a chance to set up a bit.

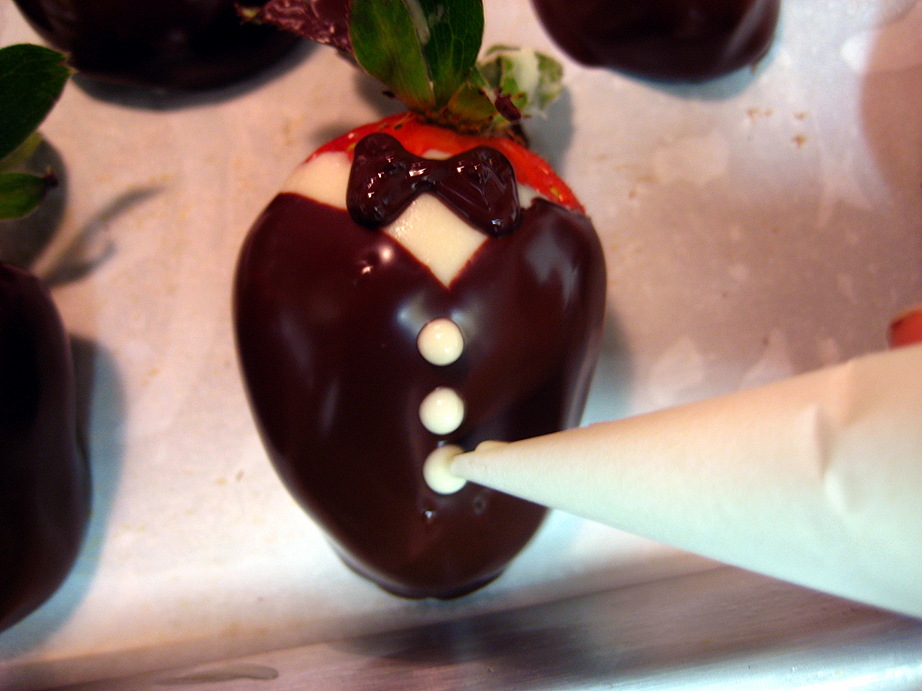
In 2 piping bags each outfitted with small round tips (or make parchment paper cones for your chocolate!), pour some of the leftover dark chocolate into one bag, and white chocolate into the other. To form the strawberries’ super cute bow ties, grab your bag of dark chocolate and start by piping a sideways, elongated Z shape on the top exposed area of white chocolate. Once you get to the top right of the Z, go back and connect the top right corner to the bottom left corner to form two triangles. Fill these in by putting slight pressure on the bag so that just a drop or two of dark chocolate comes out. You can lightly drag the tip through the chocolate to fill in any gaps, rather than piping a whole bunch of chocolate into the triangles. Continue piping the bow ties on the berries.

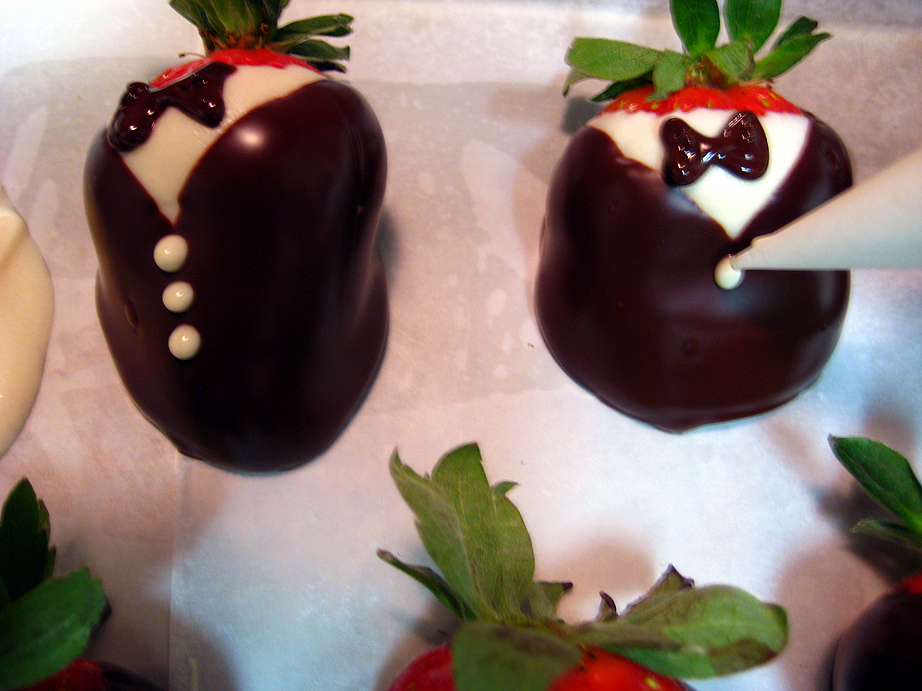
Once they’re all piped, pick up the bag of white chocolate to make the buttons on the jackets. With very slight pressure, squeeze out a tiny drop of white chocolate while almost touching the tip of the bag to the strawberry, just below the point of the triangle that makes up the shirt on each berry. Stop squeezing before you lift the bag from the surface of the berry so that the chocolate doesn’t run and make a line instead of a dot. Each squeeze and lift-off motion should only be about one second long, combined. Pipe the buttons in threes, going down the jacket fronts of the berries. Once all the berries are piped, place the pan in the fridge for 30 minutes to one hour, to make sure all the chocolate is set.

These berries are at their best when eaten on the same day they’re made. When they sit too long, the strawberry juice tends to run and puddle underneath the chocolate. To make eating them easier, set the berries out at room temperature for about 10 or 20 minutes so that the chocolate can soften slightly. If they’re eaten cold out of the fridge, you run the risk of having your lap full of pieces of chocolate that crumbled off the berries. Trust me, on Valentine’s Day, it’s not very sexy to have smudged chocolate on your nice, fancy clothes! If there are any berries left once you and your sweetie are done nibbling on them, they can be kept in an airtight container lined on the bottom with a double layer of paper towels, for up to 3 days in the fridge. Any longer, and they really start to suffer. These are so good though, that I don’t suspect you’ll have many left to save.


Yes! Finally someone writes about adobe.
Adobe? What?